# Uploading and Updating Drawings

To maximize WeBIMSync’s capabilities for handling drawings, it is recommended to upload project drawings to the SyncoBox. The steps are as follows:
# Creating Drawing Categories
# Drawing Manager Project Manager
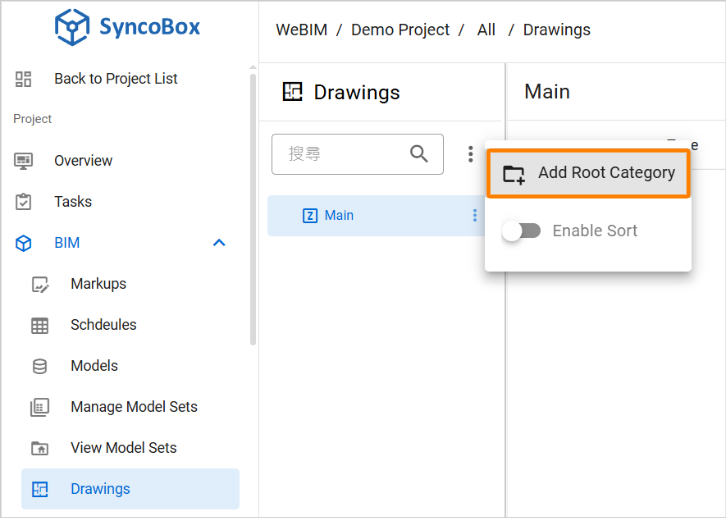
Access the SyncoBox, and enter a project.
In the project menu, click [ BIM ]
 [ Drawings ].
Click [ ]
[ Add Root Category ] to create a folder hierarchy for organizing drawings based on project requirements.
# Uploading Drawings
# Drawing Manager Project Manager
Before proceeding, please complete the DWG export settings and then upload the drawings via the WeBIMSync API.
# DWG Export Settings
In Revit, go to [ File ]
[ Export ] [ CAD Formats ] [ DWG ] from the top toolbar.Click [ ... ] button.

- Create a custom export setting. Click [ New Export Setup ] icon button in the lower-left corner, then 2 enter a name, and click [ OK ].

- Click on the [ Units & Coordinates ] tab, set the Coordinate Base to "Shared Coordinates", then click [ OK ].

- Click [ Save Set & Close ].
# Uploading Drawings via WeBIMSync API
In Revit, go to [ Add-ins ] [ WeBIMSync API ].

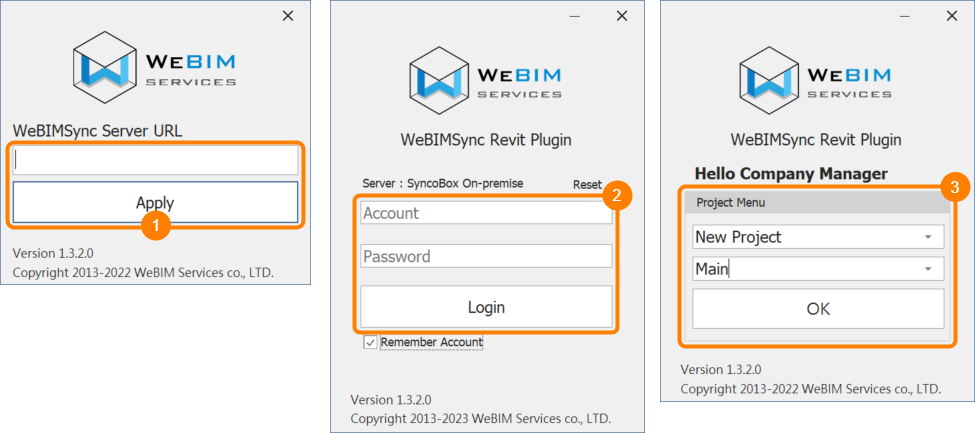
1 If using it for the first time, enter the WeBIMSync server address, and click [ Apply ].
2 Fill your account & password, then click [ Login ].
3 Select the corresponding Project and Zone, then click [ OK ].
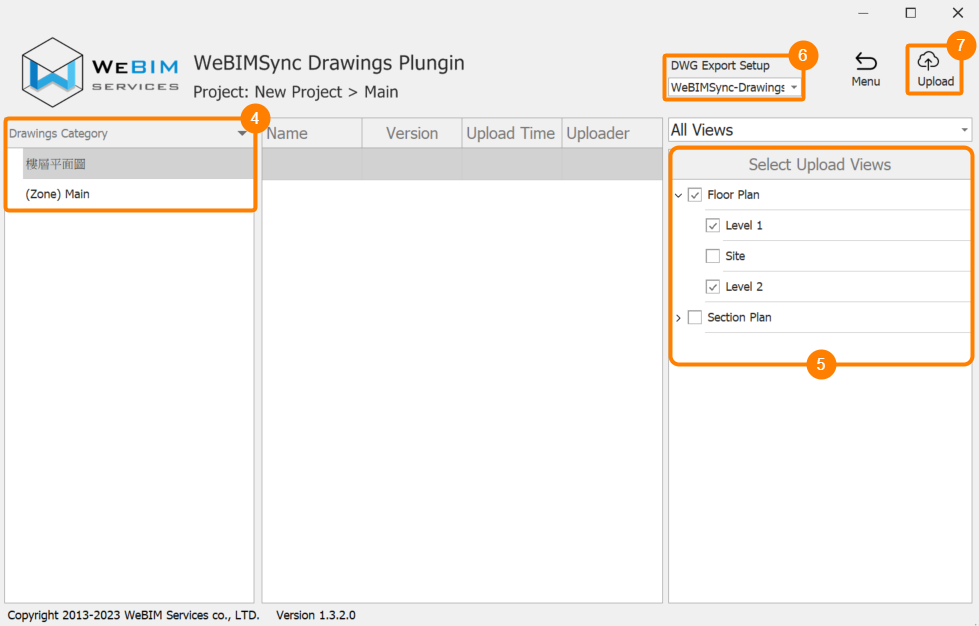
In the WeBIMSync API left-side directory, 4 select a folder for storing drawings (Please refer to Creating Drawing Categories), 5 then check on the drawings which you want to upload.
To ensure alignment between the drawings and the model’s coordinate system, select a coordinate format in 6 [ DWG Export Setup ], or define a custom DWG export setup.
Click the 7 [ Upload ] button to start uploading the drawings to SyncoBox.
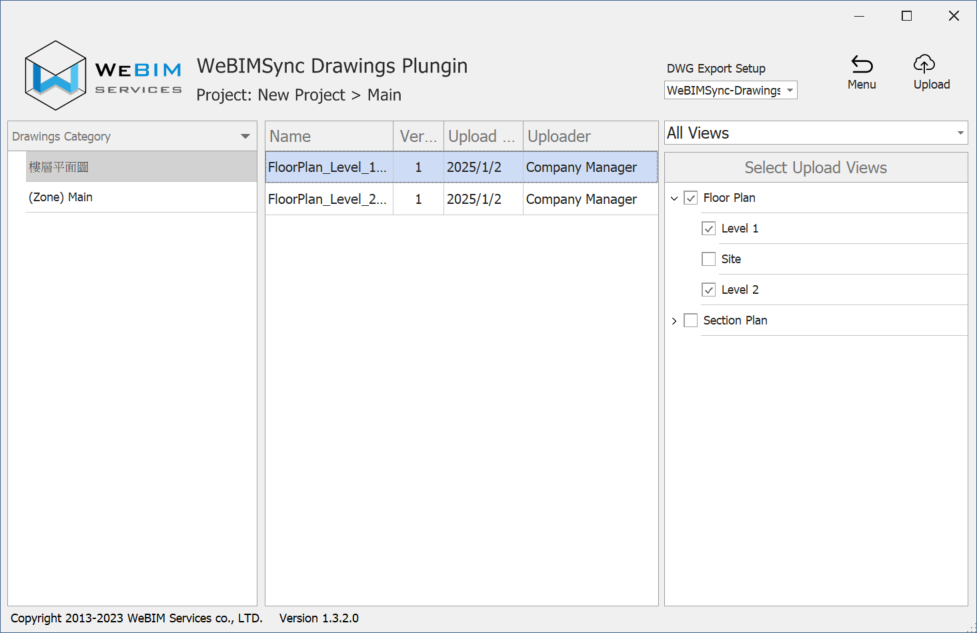
- Once the upload is complete, the system will display the uploaded Drawings Name, their Version Numbers, Upload Date, and Uploader.
# Updating Drawings
# Drawing Manager Project Manager
- Open WeBIMSync API, log in, and select the project and zone.
In 1 "Drawings Category", select the relevant root category and subcategory.
In 2 "Select Upload Views", check the drawings to be updated.
In 3 "DWG Export Setup", confirm the selected coordinate format.
- Click 4 [ Upload ] to upload the latest drawing version.
