# Updating Models

# New Model File Preparation
For the steps of model export and integration, please refer to Preparation.
# Updating Model Files
Log in to SyncoBox, and select the project.
Click on [ Models ] in the project menu.
Select the categories.
Click on [ Model Upload ] button, then upload a new version models, then click on [ Confirm ] button.

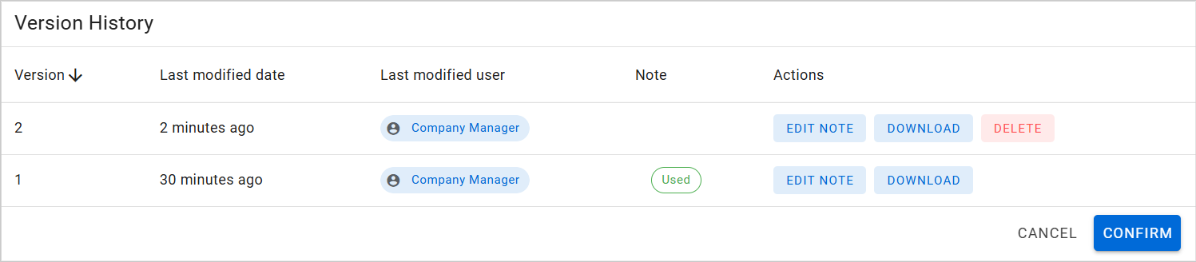
- After the model uploaded, click on the [ View Versions ] button to expand the update history.
TIP
If the file name is the same, SyncoBox will automatically update the version number when it is uploaded.
# Updating and Publishing Model Sets
# BIM Manager Project Manager
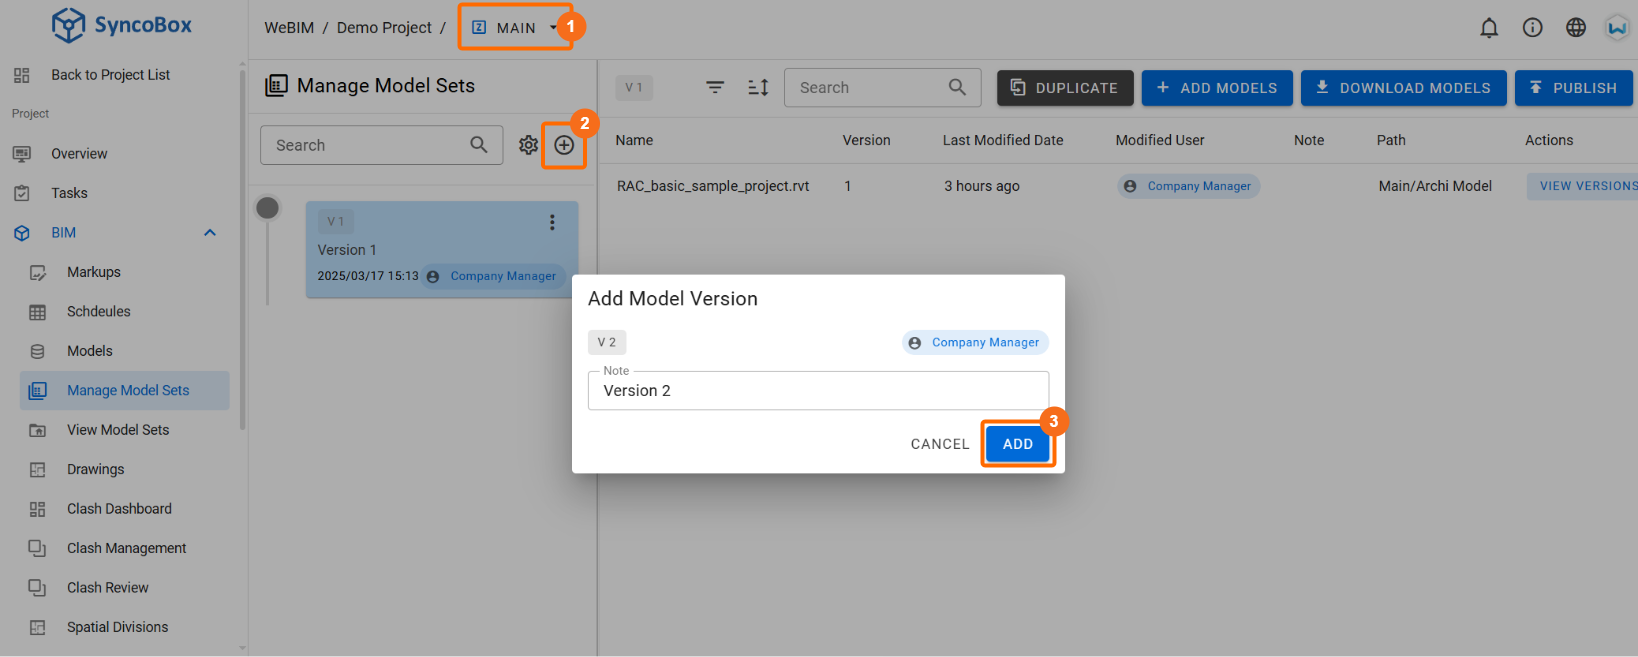
After completing model files updating , click on [ Manage Model Sets ] in the project menu.
Once you have confirmed the 1 zone, click on the 2 [ ] button and click 3 [ ADD ].
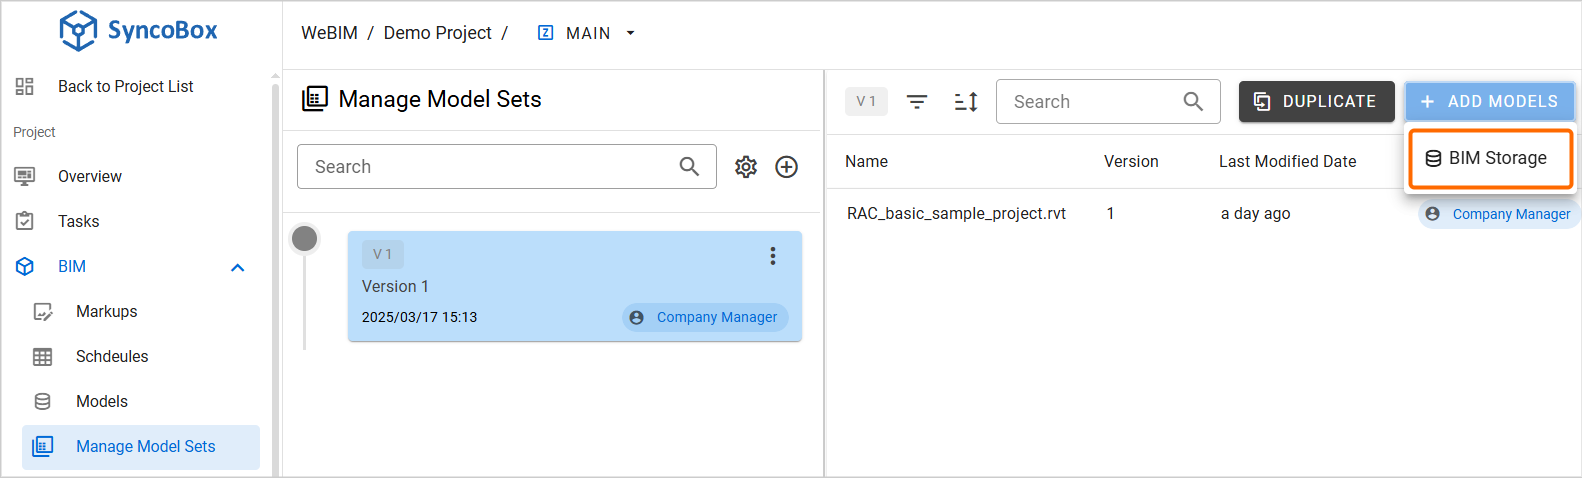
- After creating a new version, click on [ ADD MODELS ]
 [ BIM Storage ] button.
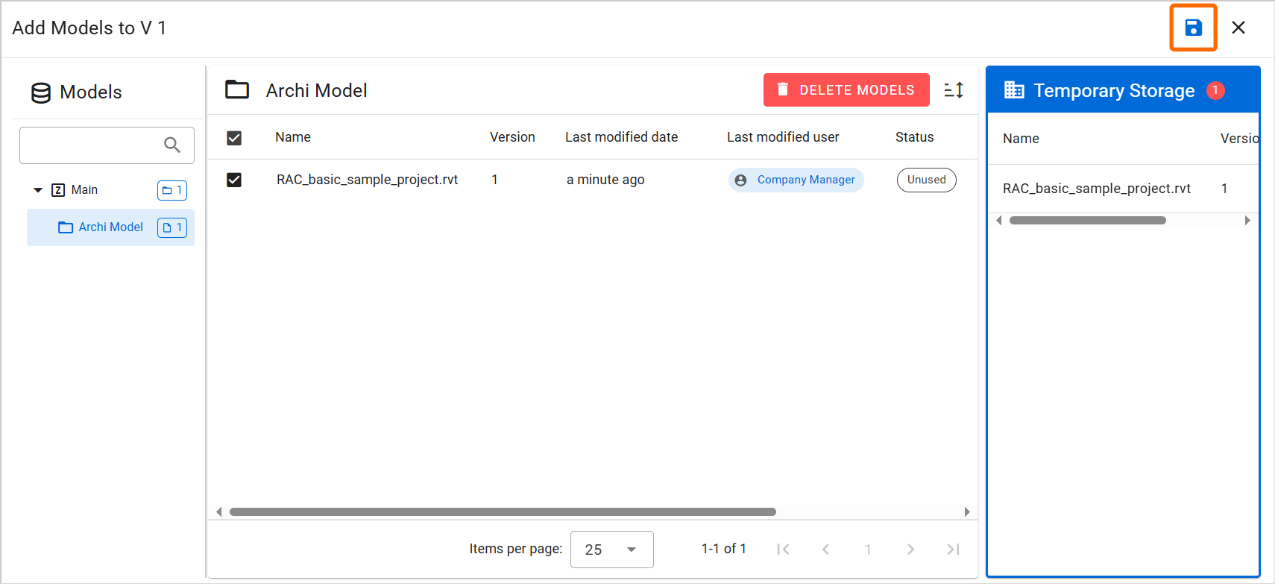
Select the BIM model files from the BIM Storage, and then click [ ] button to add it to the Temporary Storage.
Click on the [ ] button. This action will save and submit the model set version, thereby associating it with the corresponding model in the model.
- Click on the [ Publish ] button to publish the latest version.

TIP
When the model is updated, the latest version number will be displayed in blue on the version timeline; the old version will be displayed in green.