# Uploading Models

# Model File Preparation
# Project Manager General User
# Exporting NWC Models from Revit
Open the BIM project model in Revit, and split the model based on project requirements, such as zone rules.
Click on [ Export ]
 [ NWC ].

- Click on [ Navisworks Settings ] and review the "Coordinates" option under the File Readers tab.
- If "Shared" is selected during model export, ensure that the same coordinate system is used when drawings uploading.

- Click [ OK ] and save the file to complete the NWC model export process.
# Uploading Model Files
# Project Manager
Log in to the SyncoBox and access the desired project.
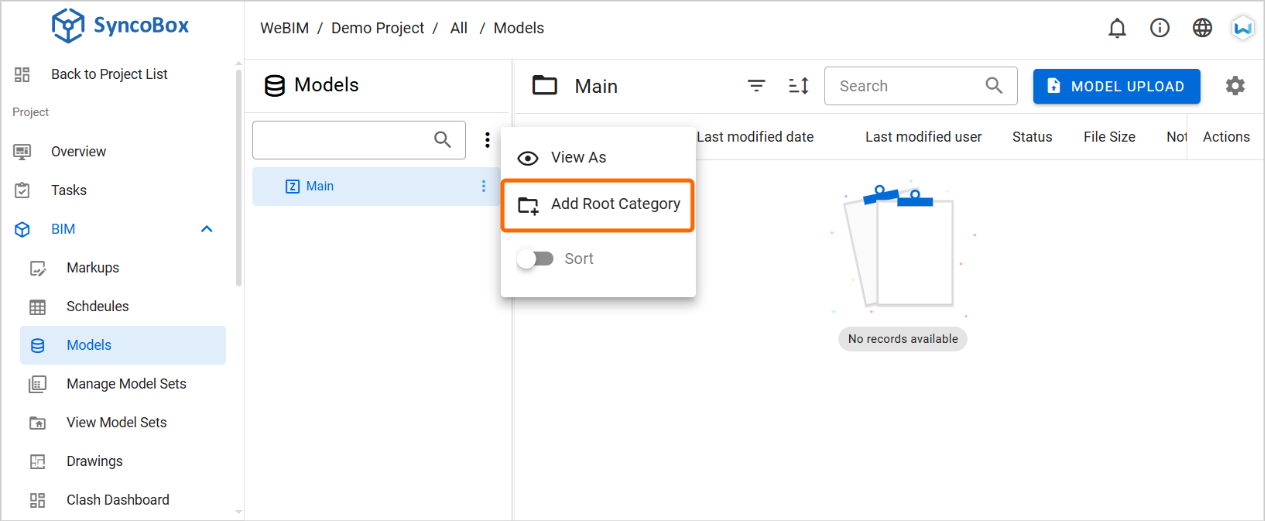
Click [ BIM ]
[ Models ] from the left-side menu.Click [ ]
[ Add Root Category ], enter a name, and create the root category.
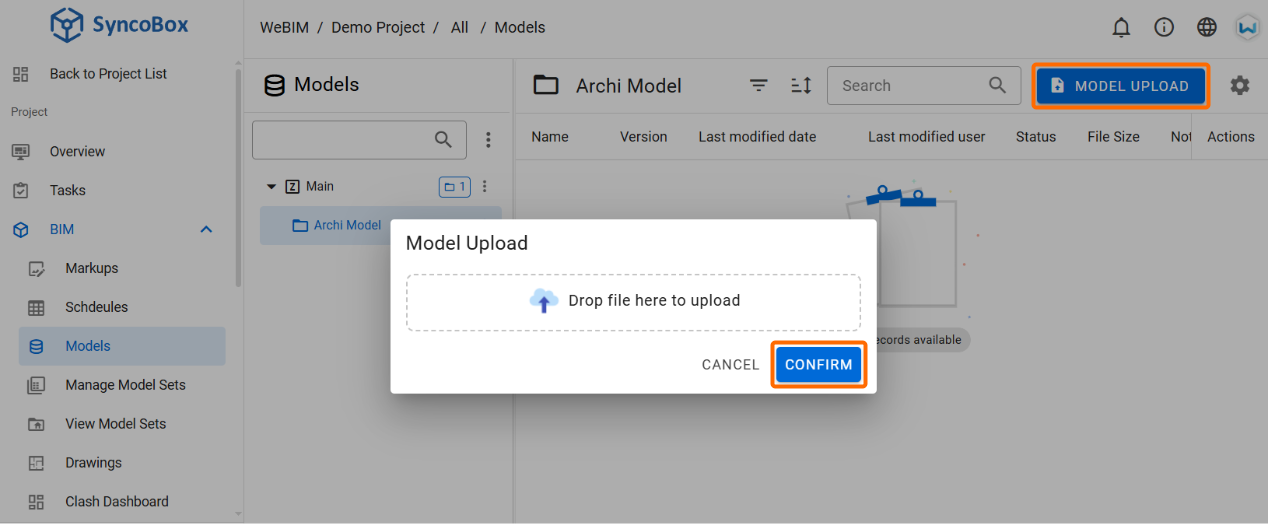
- Click the [ MODEL UPLOAD ] button and select the files to upload.
TIP
The BIM model storage allows the creation of a hierarchical folder structure to accommodate project-specific needs. This structure can organize BIM models by disciplines, subcontractors, or other criteria, with individual access permissions configurable for each folder.
For more details on setting permissions by category, refer to Permissions Settings.
# Model Set Configuration and Publishing
# Project Manager BIM Manager
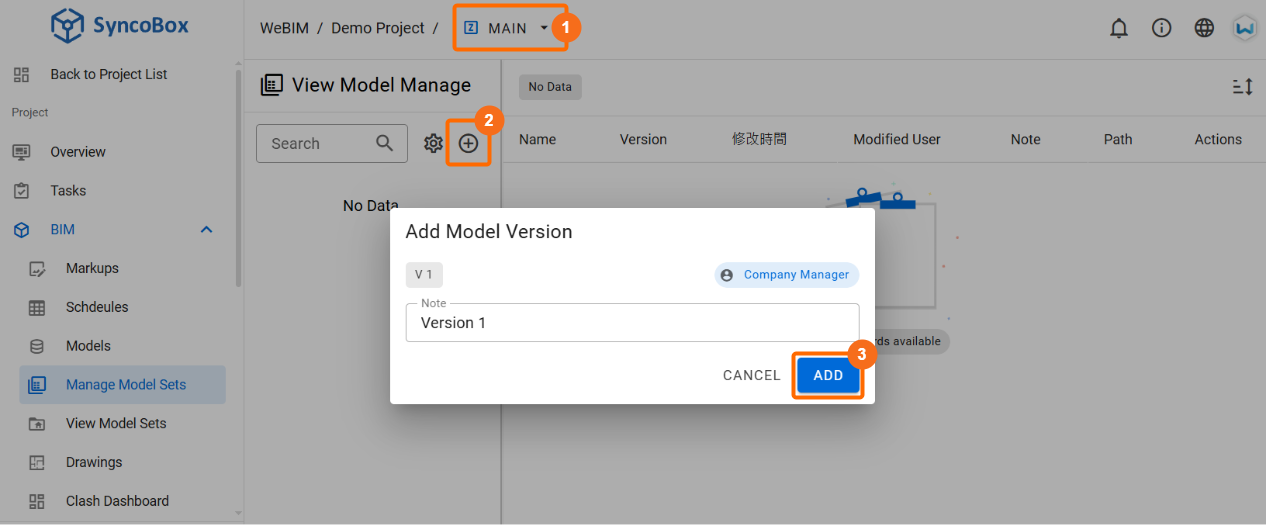
After uploading files to the model storage, click [ Manage Model Set ] from the menu.
Confirm the target 1 zone, then click 2 [ ] button to create a new model set. Add relevant notes as needed and click 3 [ ADD ] button to complete the creation of a model set version.
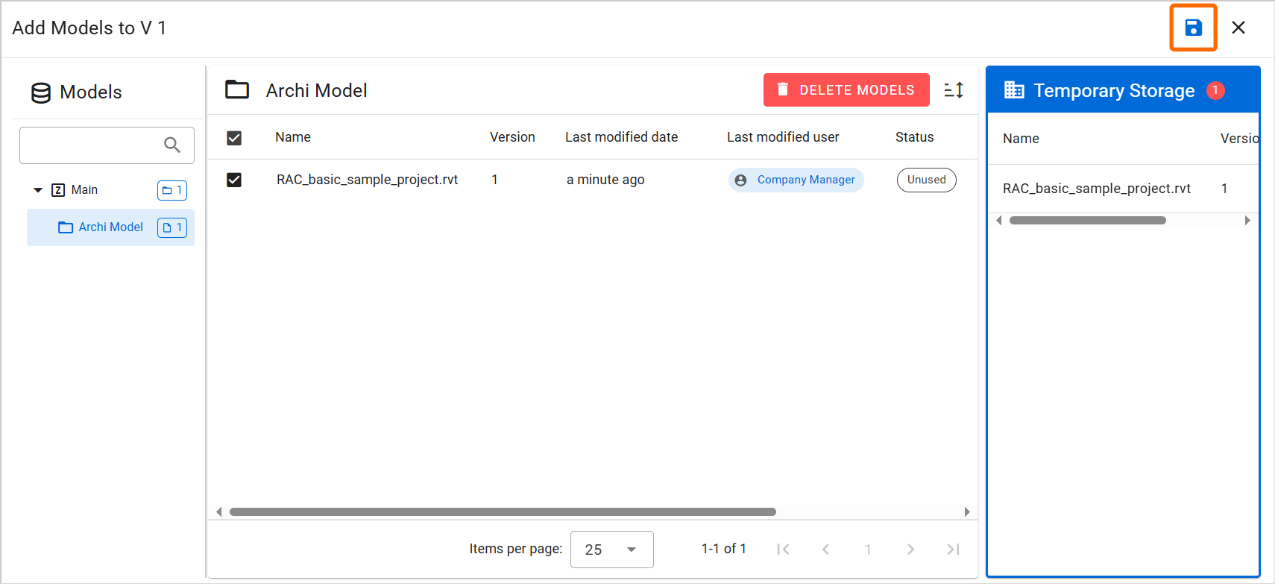
- After creating a new version, click [ Add Models ] [ BIM Storage ] in the upper-right corner.
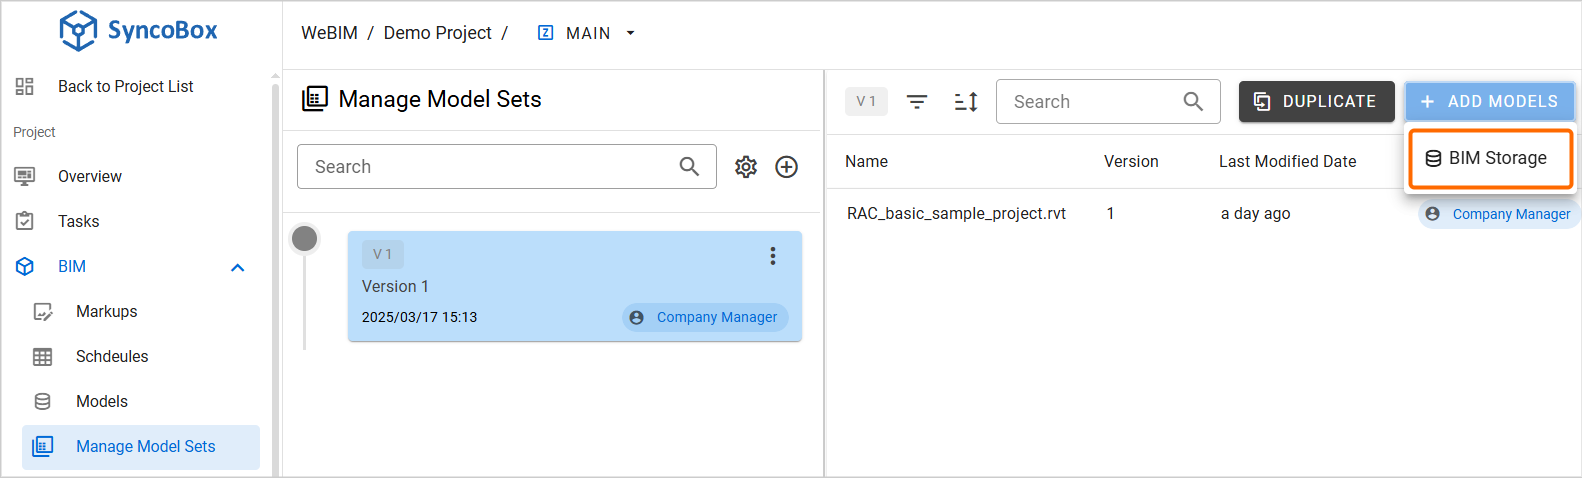
- Check the BIM model files for add them to the "Temporary Storage", then click [ ] icon button to link the model set version with the model from BIM Model Storage.
- Finally, click the [ Publish ] button to release the latest model version.
