# Markups
Markup and issue tracking are crucial for effective communication and problem-solving in project management and collaboration. This chapter introduces the "Markup" functionality within WeBIMSync and SyncoBox, allowing users to mark issues, clarify concerns, and enhance project collaboration efficiency.
This chapter covers the following sections: Creating Markups, Viewing and Editing Markups, Markup Status, Markup Task Assignment, Commenting, Photo Capture and Comparison Mode, Markup Management, and Markup Dashboard.
# Creating Markups
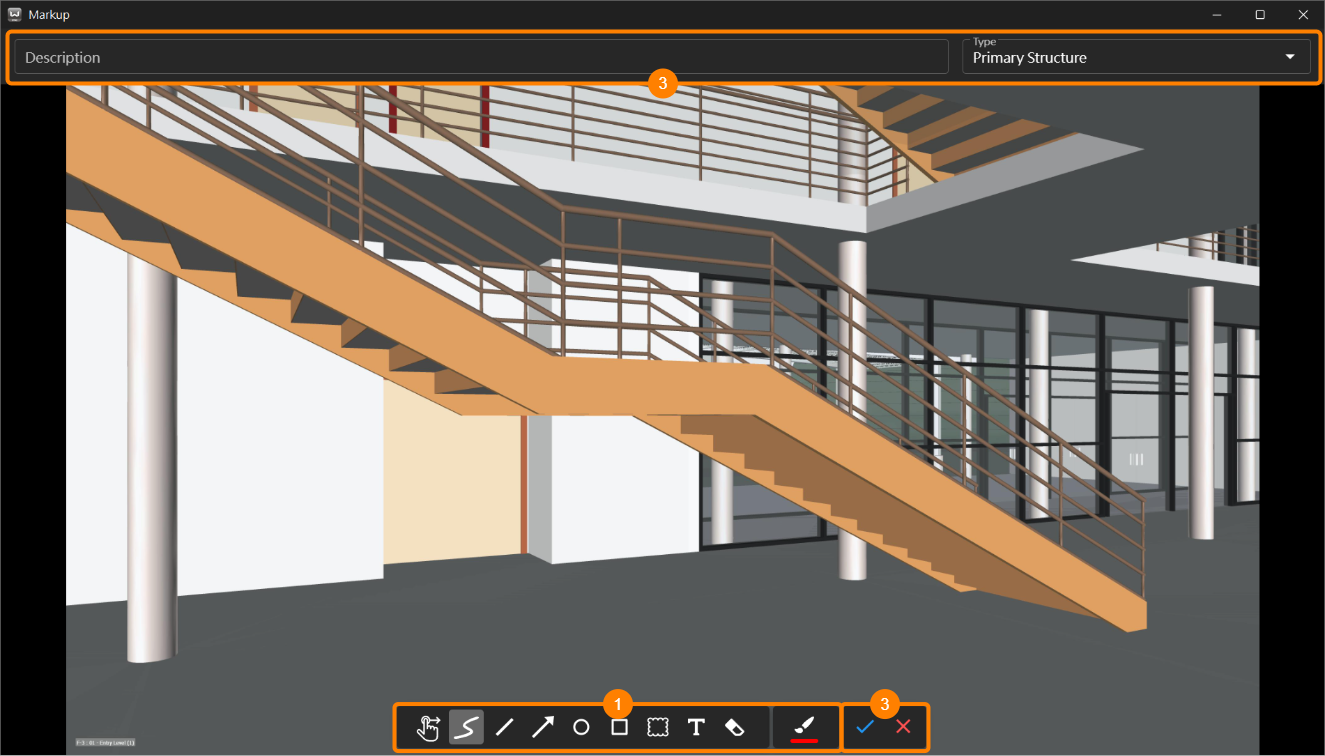
Click the [  ] icon button on the right-side toolbar of WeBIMSync to capture the current view and open the markup editor:
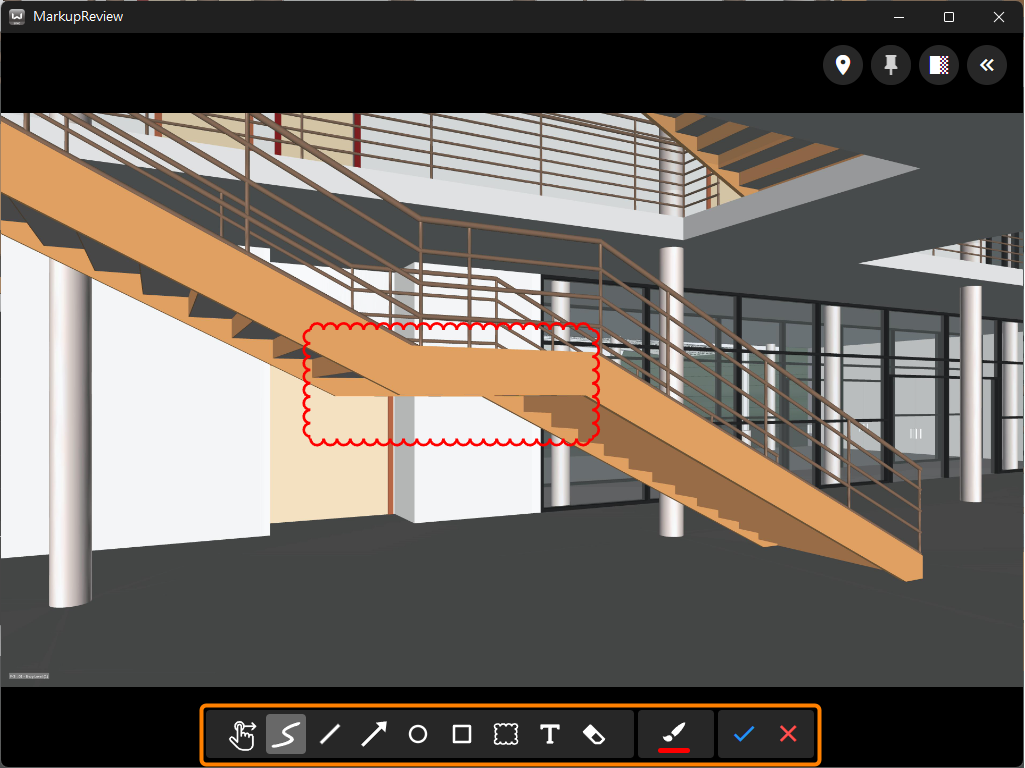
Use the 1 editing tools to draw, circle areas, or add text annotations to describe issues.
At the top of the editor, you can 2 enter a description and select a markup type.
Click 3 [ ] to complete the markup, or click [ ] to discard.
# Viewing and Editing Markups
- Click the [
 Markup ] button in the left-side panel to view published or unpublished markups.

- Double-click a markup item to open a "MarkupReview" window. Markups in draft status can be edited.
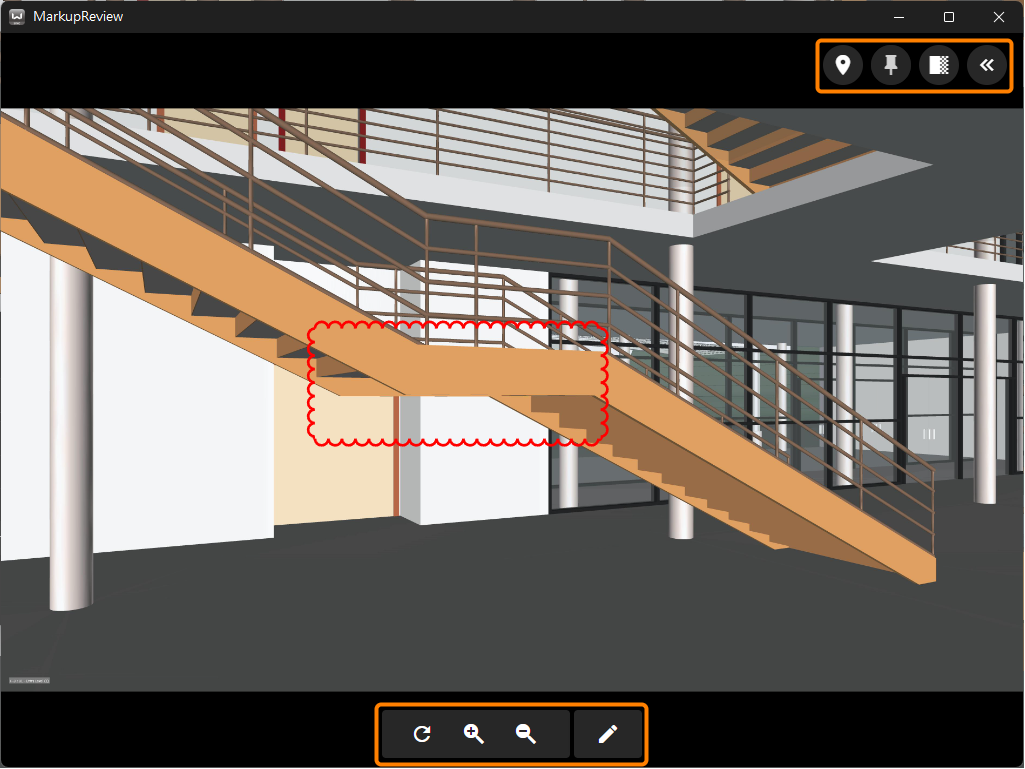
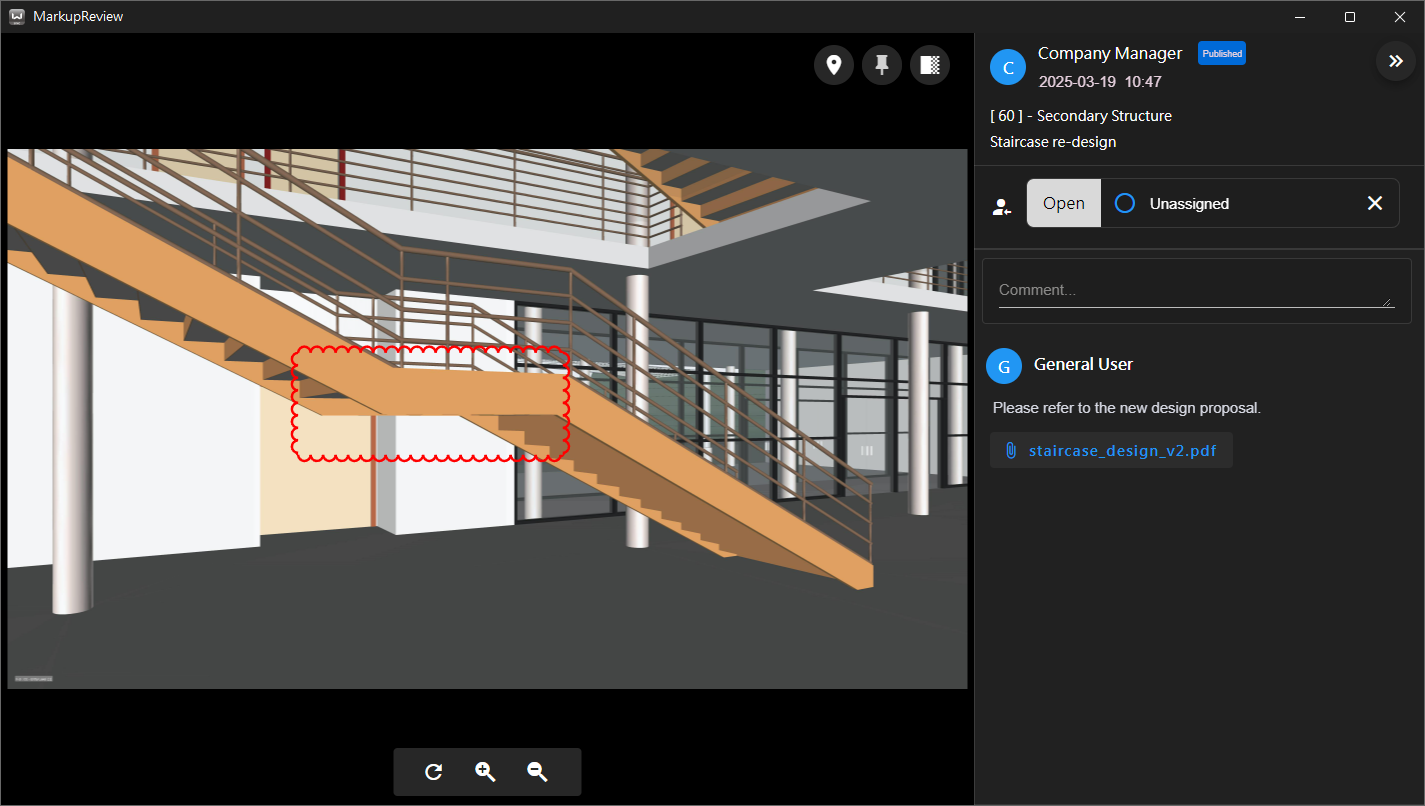
In the MarkupReview window, the following actions are available in the top-right corner:
Click the [ ] button to quickly navigate to the markup's position.
Click the [ ] button to keep the MarkupReview window always on top.
Click the [ ] button to adjust the MarkupReview window's transparency.
Click the [ ] button to reveal detailed markup information; click [ ] to modify markup's description and type.
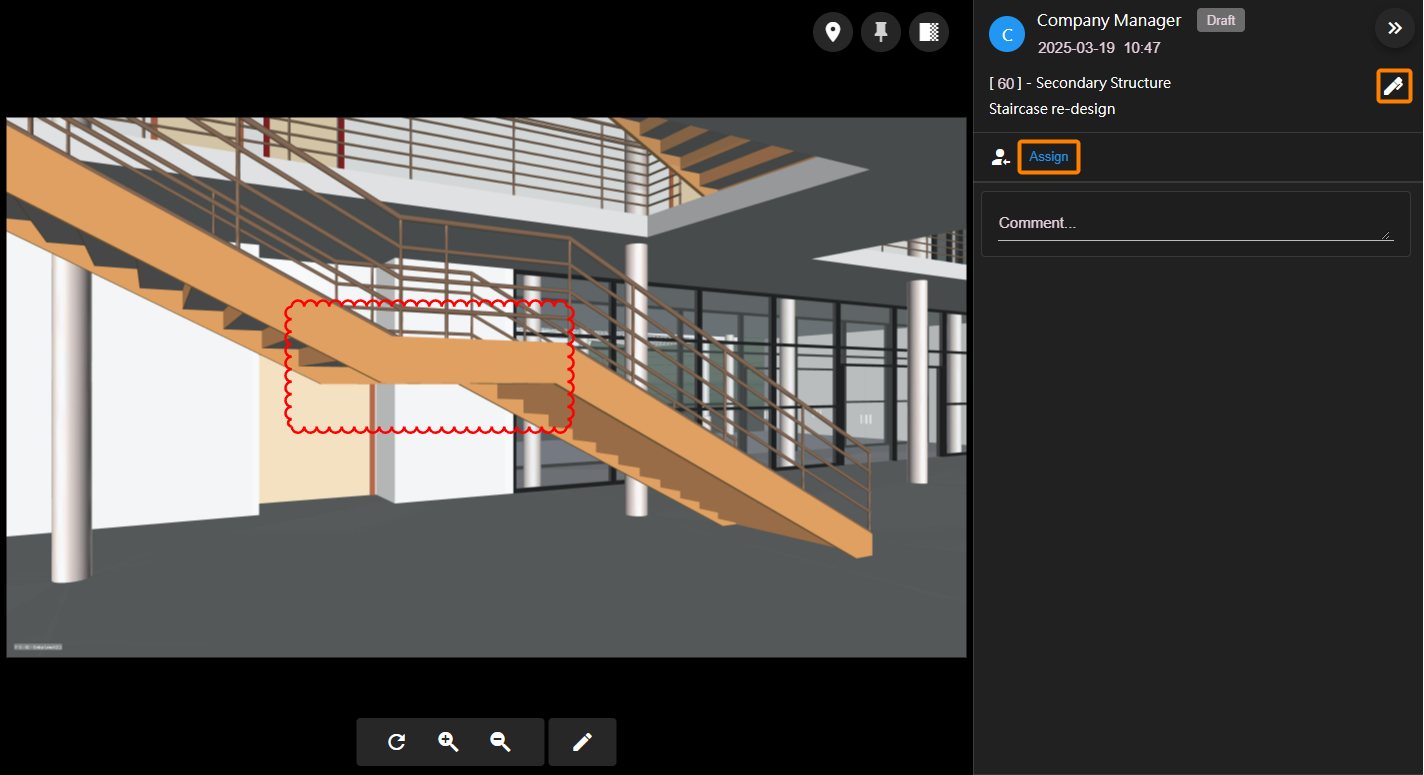
- Click [ Assign ] to delegate markup tasks to project members, including due dates and importance.
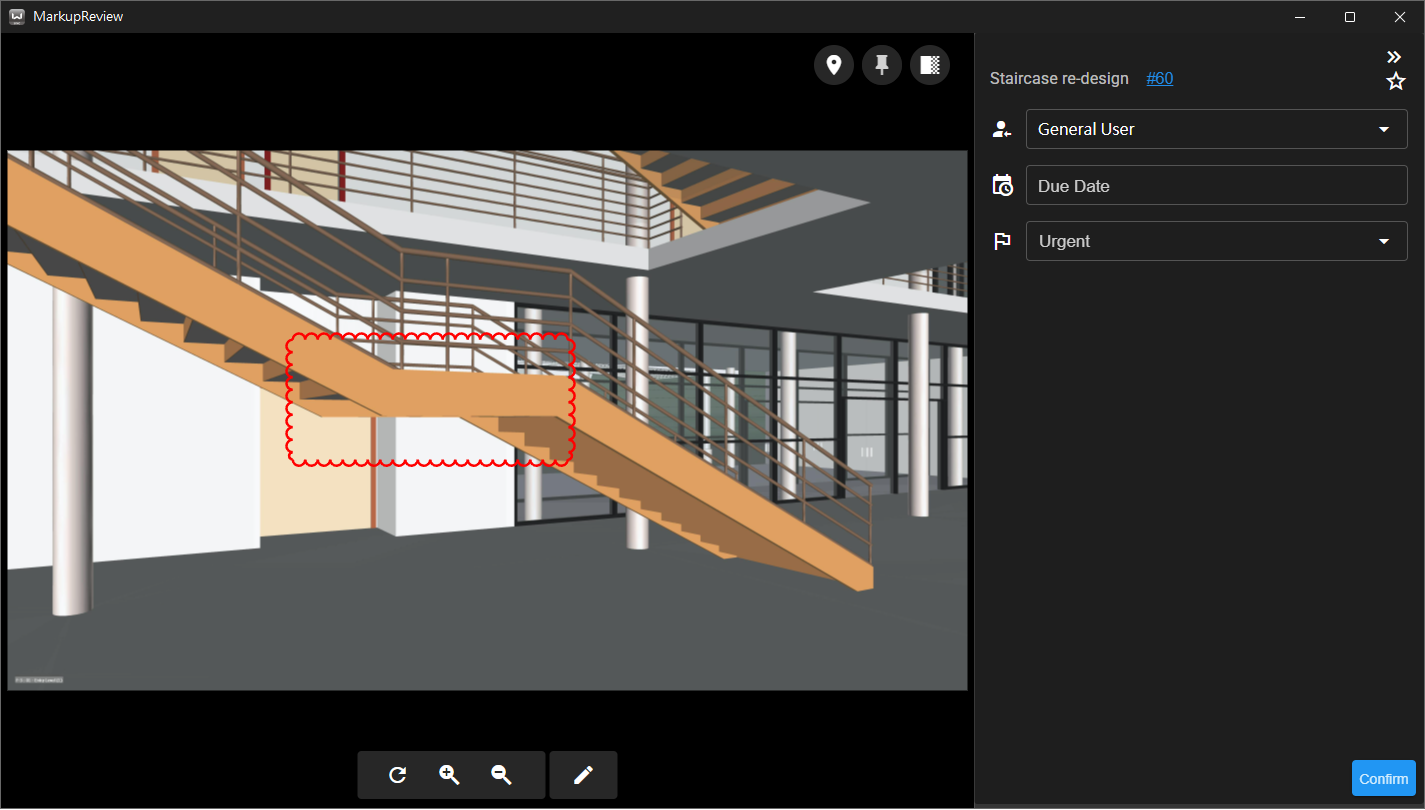
Click [ ], [ ], and [ ] buttons to zoom in, zoom out, or reset the markup view.
Click [ ] to collapse the markup details for full-screen preview.
Click [ ] to open the editing bar. Click the [ ] button to save changes.
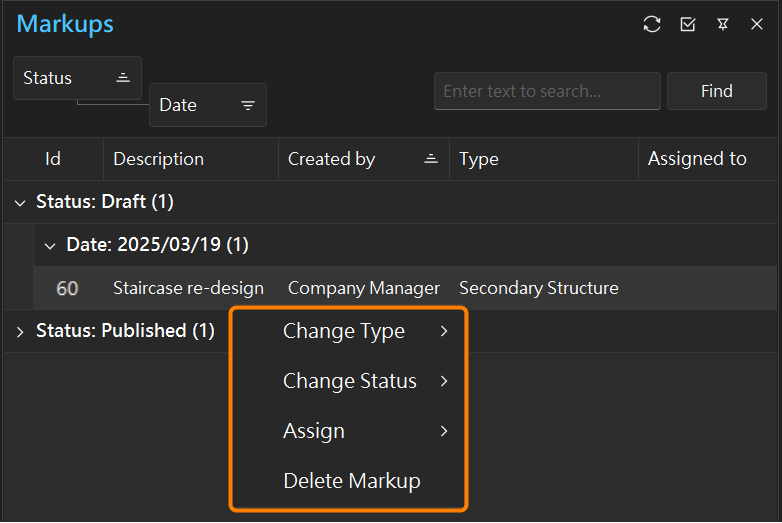
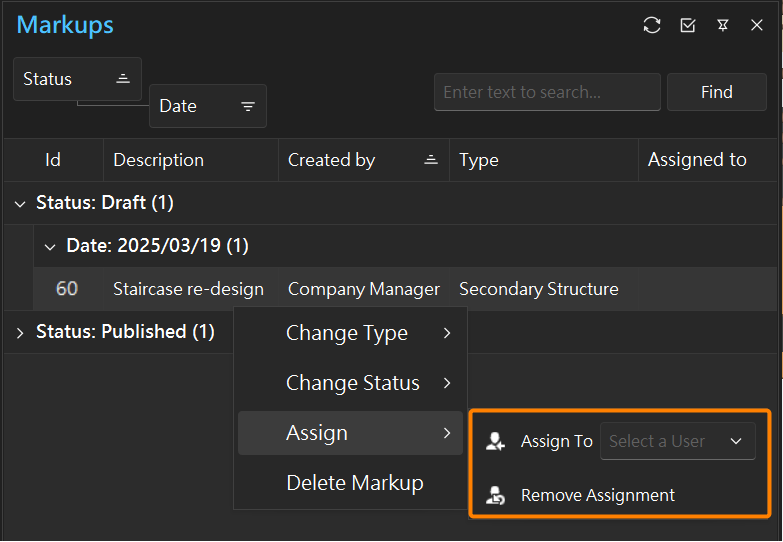
- Close the MarkupReview window to return to the main interface. In the markup list, right-click on a draft markup:
Change Type: Change markup categorization.
Change Status: Submit the draft for publishing.
Assign: Delegate markup task to a project member.
Delete Markup: Remove the markup.
# Markup Status
Markup statuses include "Draft," "Published," and "Closed":
Draft: Initial state after creation, viewable and editable only by the creator; can transition to "Published."
Published: Visible to all zone members who can view and comment but not edit; change to "Draft" if wants to editing. Once resolved, markups can be changed to "Closed".
Closed: Indicates completion; markups can revert to "Draft" or "Published" states.
Once a draft markup is confirmed, right-click in the markup list, select "Change Status", and choose "Published" to publish the markup.
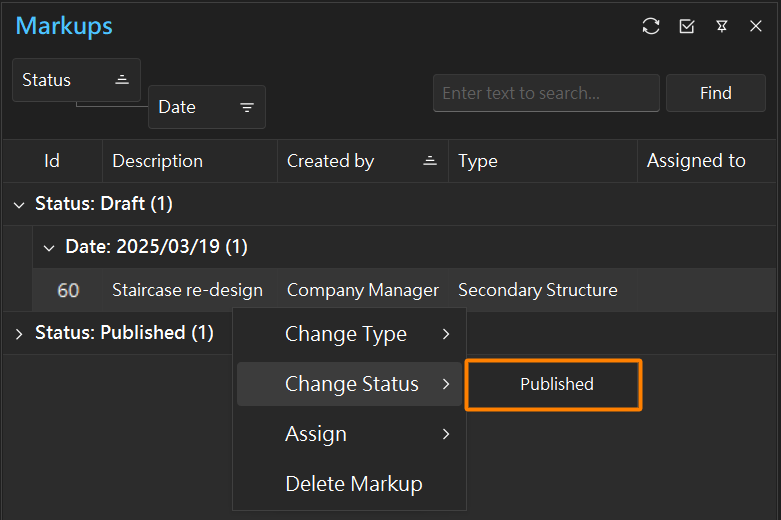
- After submission, the markup status will update from "Draft" to "Published". The process for changing it to "Closed" follows the same steps.
# Markup Task Assignment
After creating a markup, it can be assigned to a specific user as the responsible person.
Right-click on the markup entry and select [ Assign ] to allocate responsible user and create tasks.
TIP
Both SyncoBox and WeBIMSync support task assignments through MarkupReview windows.
WARNING
Even after task assignment, markups must be published (status set to "Published") to be visible to others. Drafts are viewable only by the creator.
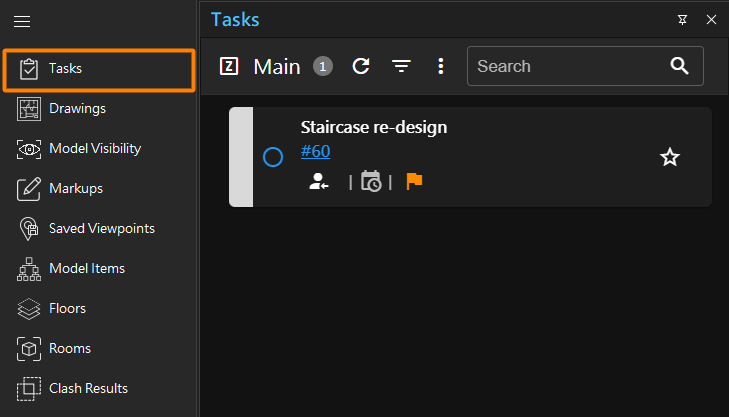
Assigned markup tasks appear in the WeBIMSync [ Tasks ] panel.
As shown in the example below, click the task ID: #60 to open the associated markup.
TIP
Refer to the Tasks chapter for more detailed instructions.
# Commenting
Click a markup entry in the markup list to open the MarkupReview window.
Click [ ] at the top-right corner of MarkupReview window to access detailed markup information. Project members can discuss and upload attachments in the comment area.
- SyncoBox also supports commenting within markup entries.

# Photo Capture and Comparison Mode
Use camera-equipped mobile devices to capture photos, compare virtual models and real-world scenes, and improve communication efficiency:
On a device with camera functionality, click the [
 ] button in the right-side toolbar to enable camera mode.
The screen divides into two sections: the model view on the left, and the live camera view on the right.
After capturing an image, it will be saved as a markup draft along with the model view.
Click the [
] button to capture an actual image and submit it as a markup draft along with the model view.Return to the markup list, click the markup entry to further edit the markup and clarify issues.
Activate "Comparison Mode" to display the virtual model markup alongside the real-world captured image.

Complete the draft and submit for publishing by right-clicking the markup entry and click [ Submit ].
Open the markup, expand details using the [ ] button, and utilize comparison mode, comments, and attachments.
SyncoBox also provides comparison mode and commenting within markup entries.

# Markup Management
Users can centrally manage markups from WeBIMSync on SyncoBox, quickly review issues, assign tasks, and track progress:
Log in to SyncoBox and select the relevant project.
Click [ BIM ]
 [ Markups ] from the menu.
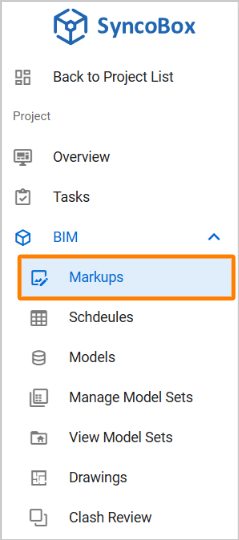
- Navigate to the correct zone 1 to review markups created in WeBIMSync. Click markup entries for detailed information.

- Markup details include:
1 Creator and remarks: Displays the creator and related descriptions.
2 Comment section: Allows project members to discuss and attach files.
3 Comments: Records all member interactions.
4 Assignment: Enables delegation of markup responsibilities.
5 Markup adjustments: Adjusts markup's visibility, transparency, and style.
6 Viewer adjustments: Supports zoom in, zoom out, reset, and copying model views.

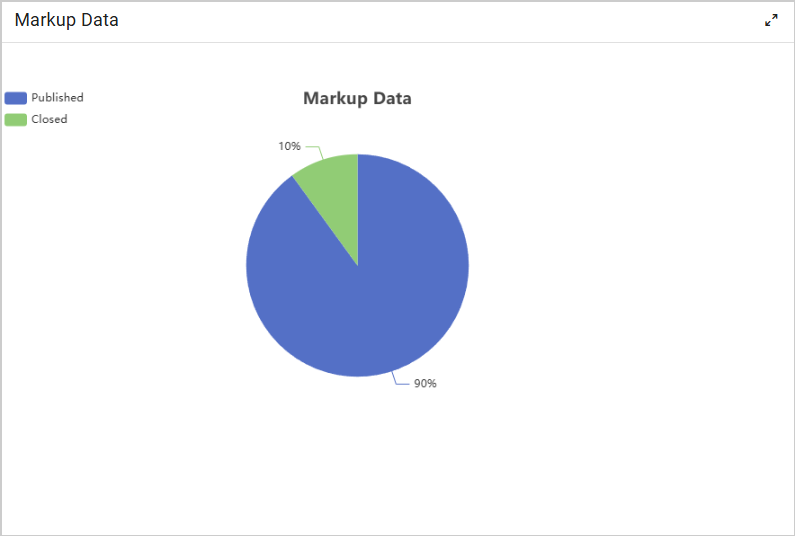
# Markup Dashboard
Log in to SyncoBox and select the relevant project.
Navigate to [ Overview ] in the project menu and find the "Markup Data" section.
The "Markup Data" section provides a pie-chart visualization of markup processing status across the project.