# Overview
To address diverse needs and challenges, SyncoBox and WeBIMSync offer Task management functionality, enabling users to organize, assign, and track task progress efficiently. This chapter provides a detailed introduction to the key concepts and user interface of the task management feature, helping users effectively utilize these tools.
TIP
Tasks can be created independently on the SyncoBox or linked to markups and assign to relevant personnel.
# Interface
# SyncoBox
Users can centrally manage, create different types of tasks, assign them, and track their progress on SyncoBox.
After logging into the SyncoBox, select a project.
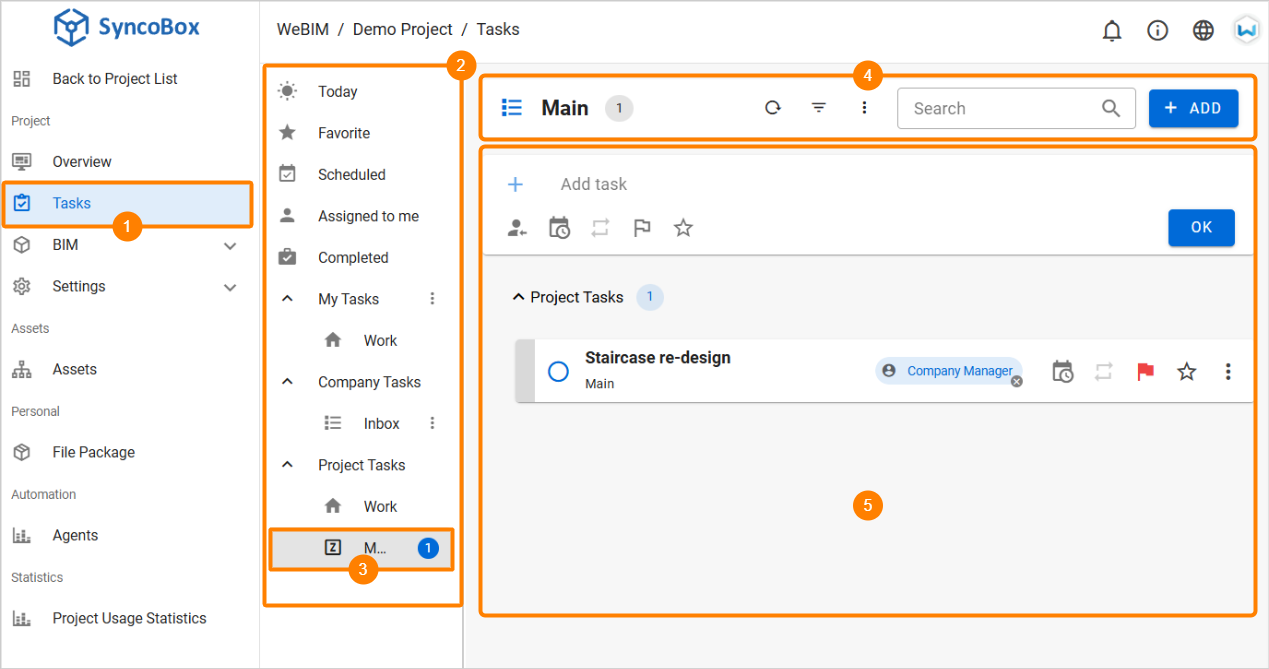
In the project menu, click 1 [ BIM ]
 [ Tasks ] to access the task interface.
The 2 sidebar allows users to switch between task categories, including Today, Favorite, Scheduled, Assigned to Me, Completed, My Tasks, Company Tasks, and Project Tasks.
Within the project task section, icons represent 3 Zone Task, which synchronize with zones created within the project.
The top 4 toolbar of the task page displays the current list location and task count on the left, while the right side includes options to add new task, search for task, adjust display settings, apply filter, and refresh the list.
5 The task list provides a quick overview of task statuses and related information. For more details, refer to the Task Details section.
# WeBIMSync
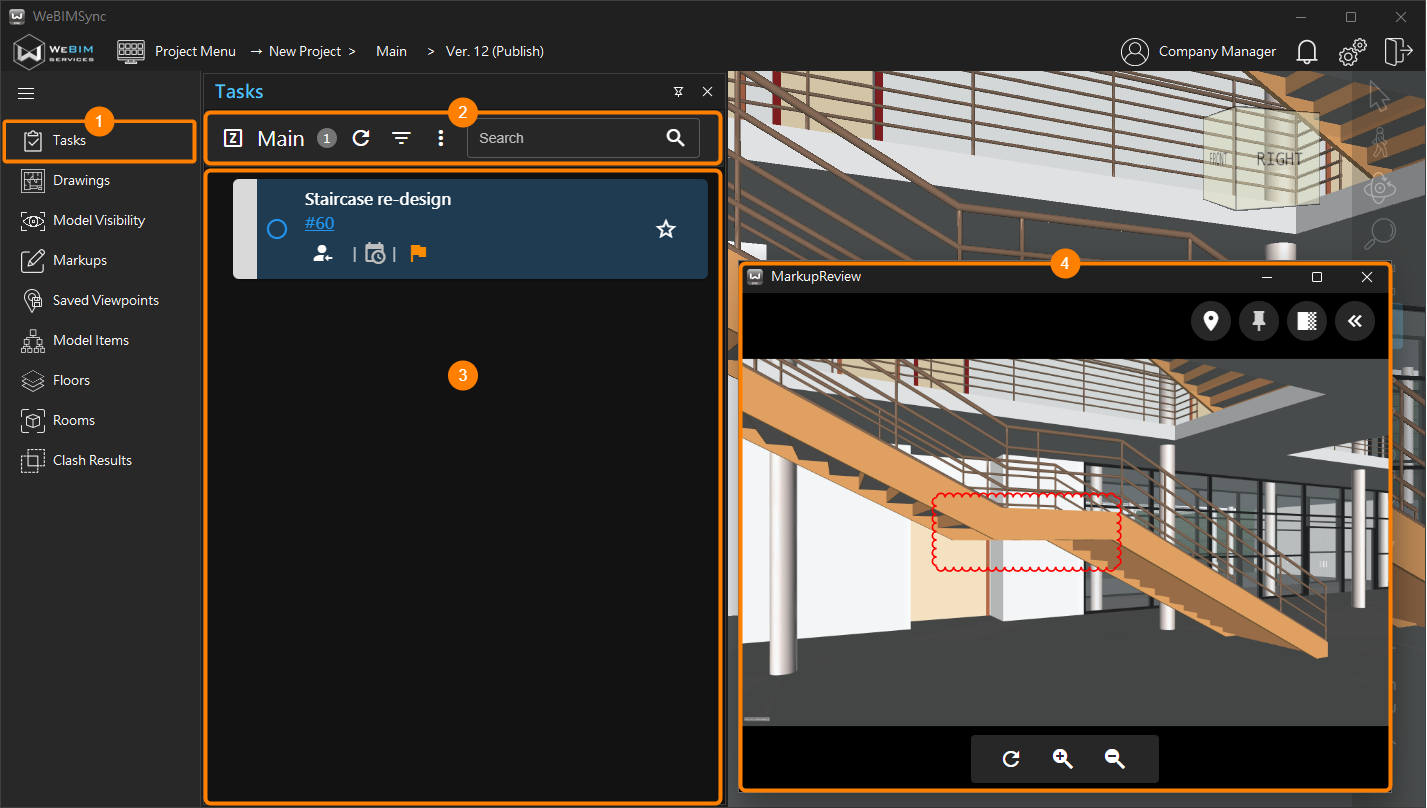
Open WeBIMSync, enter the project, and click the 1 [ Tasks ] module on the left panel to display the task list for the current zone.
The task list displays tasks relevant to the current zone, and users can switch zones using the top menu options.
2 The Toolbar on the left shows the current zone name, task count, search, filter, and refresh options.
3 The Task List provides a quick overview of task statuses and related details. For more information, refer to the Task Details section.
Clicking an associated markups in a task, such as 3 "#60", opens the 4 MarkupReview, and the WeBIMSync model view synchronously adjusts to the screenshot perspective of the markup.
# Task Details
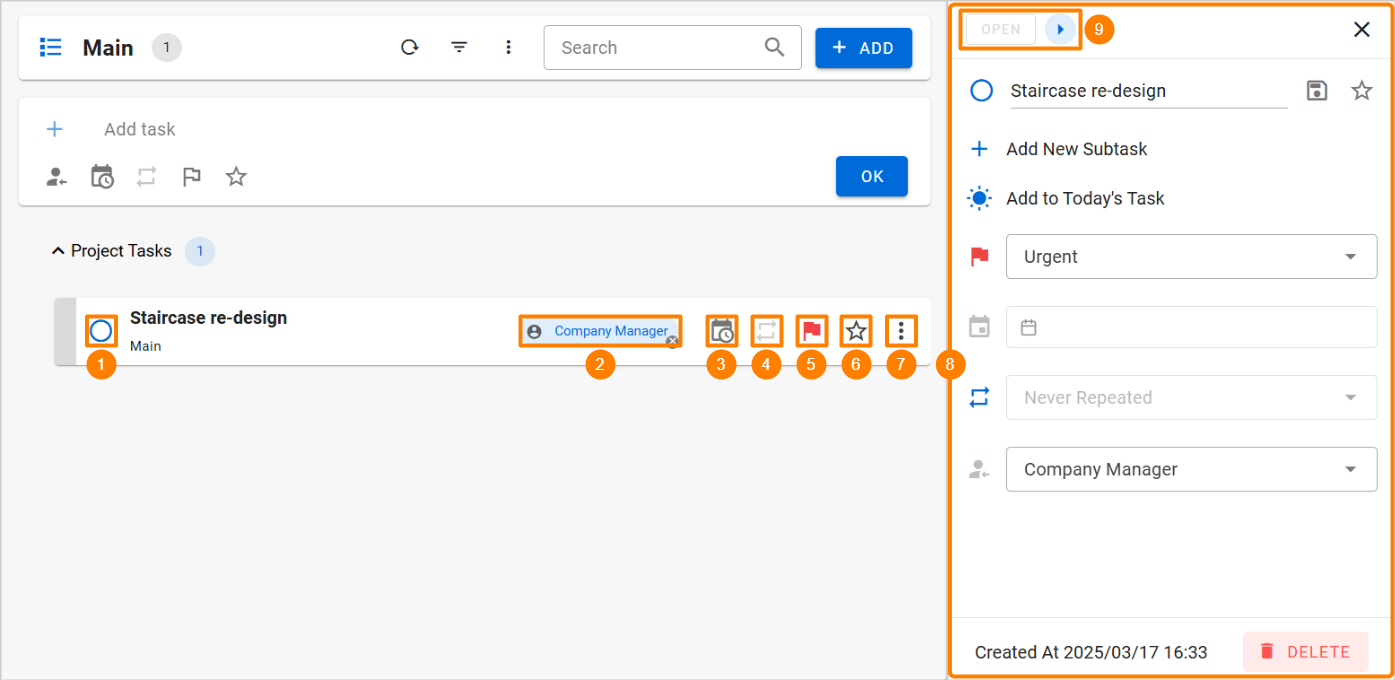
The task list contains various information, described as follows:
1 Task Status: Displays the current execution progress of the task, with color-coded indicators for different status categories. Users can click to modify the progress.
2 Assignee: Shows the person responsible for the task. Clicking the name allows viewing detailed information about the assignee.
3 Due Date: Displays the task's deadline. Clicking allows users to edit the due date, with the detailed panel providing a more comprehensive time display.
4 Repeat: Configures the cycle for tasks, facilitating the management and tracking of routine tasks.
5 Importance: Tasks are categorized into four levels of importance using different color indicators: Urgent, High, Normal, and Low.
6 Pin Task: Clicking the icon toggles the task into the favorite, accessible from the sidebar under the Favorites menu.
7 Options: Includes the [ DELETE ] option, which permanently deletes the task and cannot be undone.
8 Detail Panel: Clicking a task in the list expands this panel, allowing users to view and edit all task details.
9 Task Status Button: Displays the status, and clicking the button quickly transitions the task to the next phase.
← Markups Task Creation →