# Task Creation
# Normal Tasks
# Steps
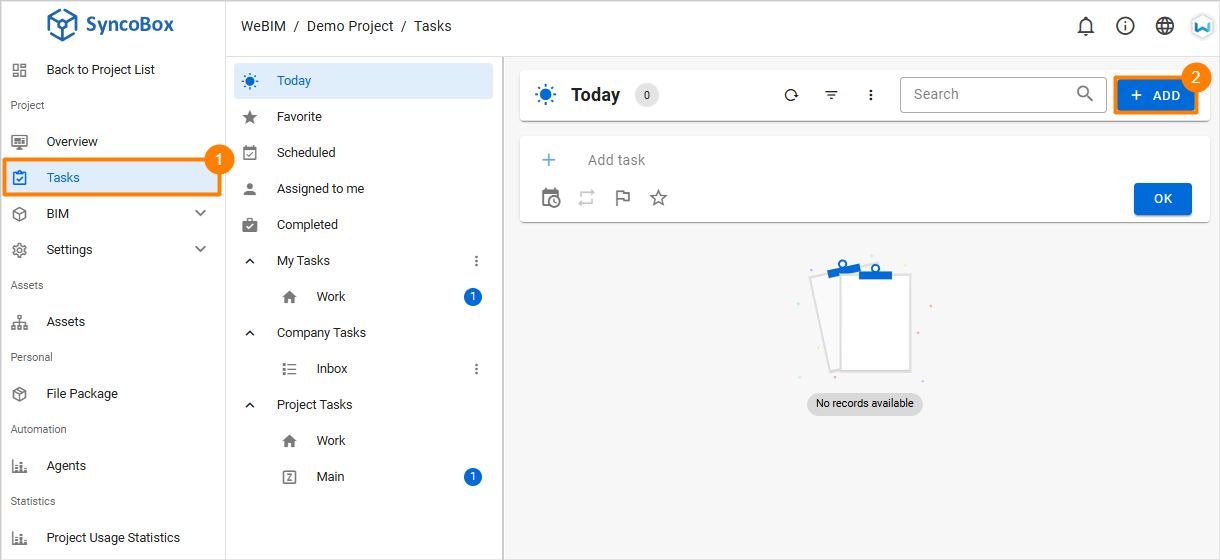
Log in to the SyncoBox, and select the project.
In the project menu, click on 1 [ BIM ]
 [ Tasks ]. By default, it will display the "Today" page.
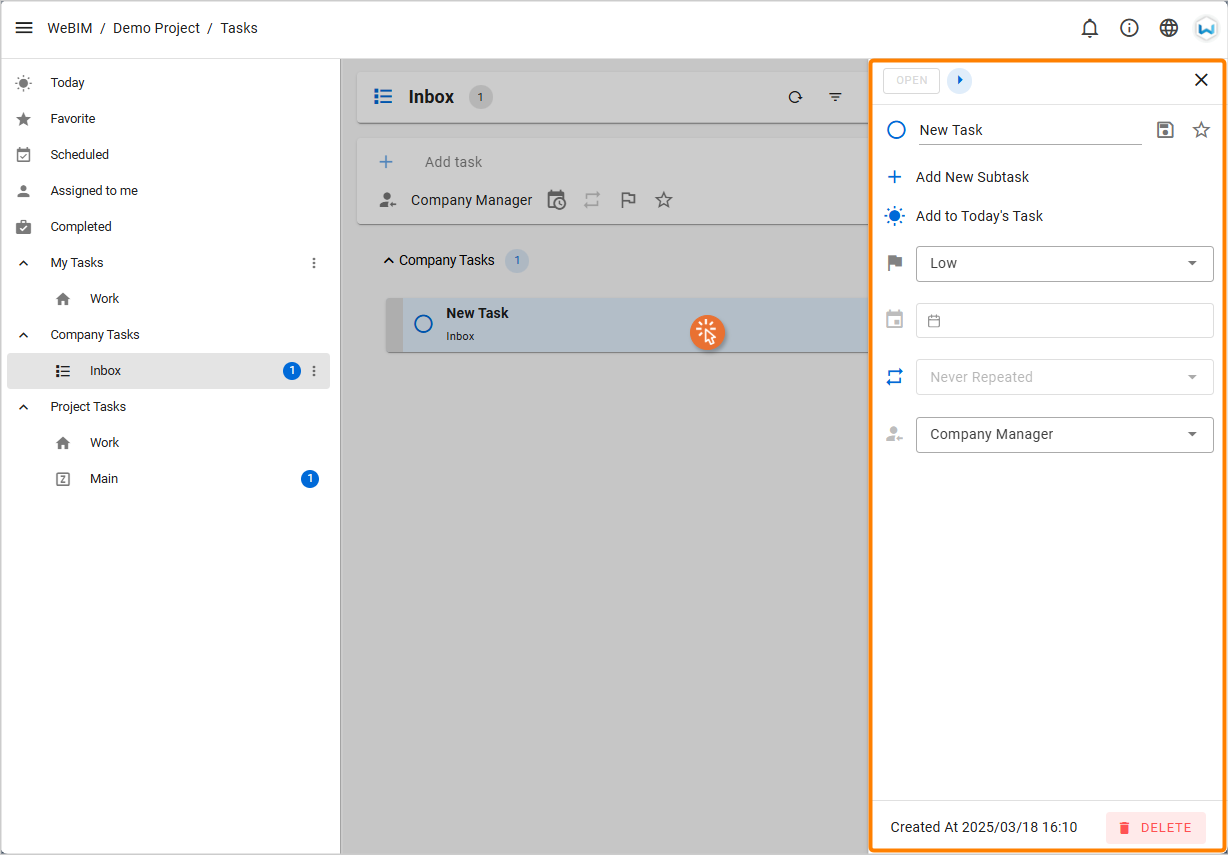
Click the 2 [ ADD ] button to open the "Add Task" window.
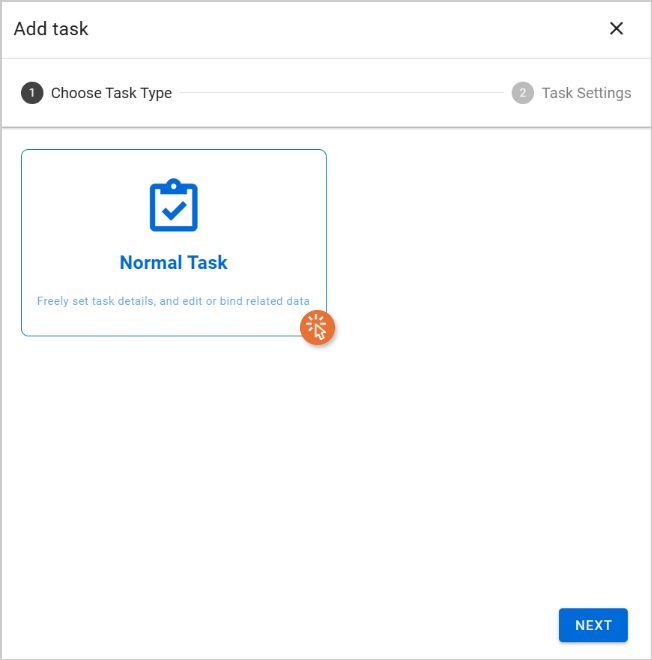
In the Add Task window, select [ Normal Task ] and click [ Next ] button to proceed to the detailed task settings page.
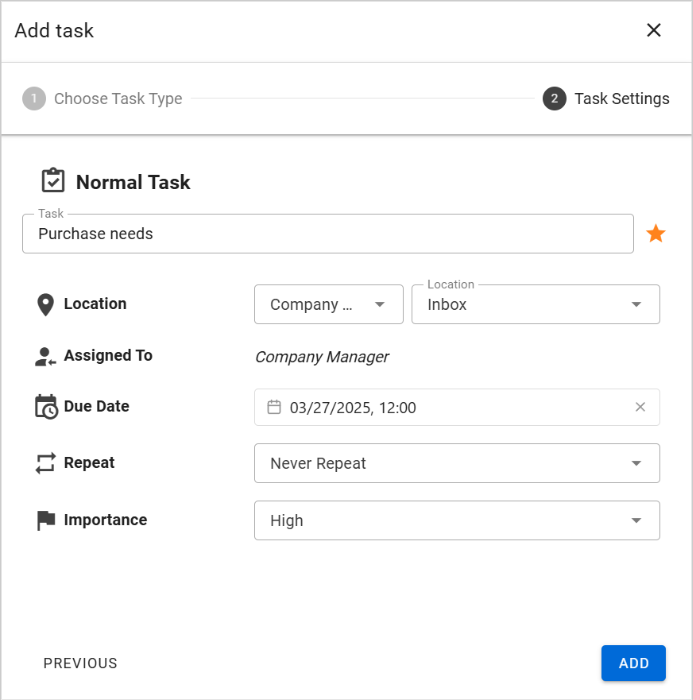
- Configure the task details, including Task Name, Location, Due Date, Repeat, and Importance. After entering the necessary details, click [ ADD ] button to create the normal task.
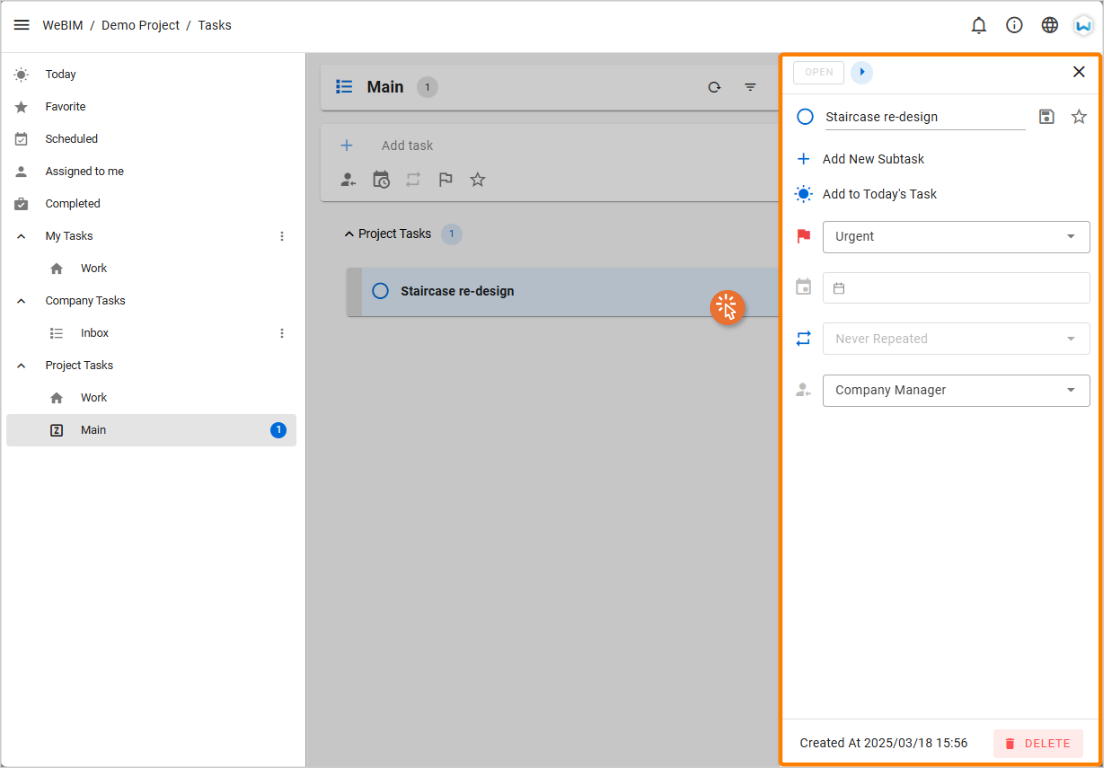
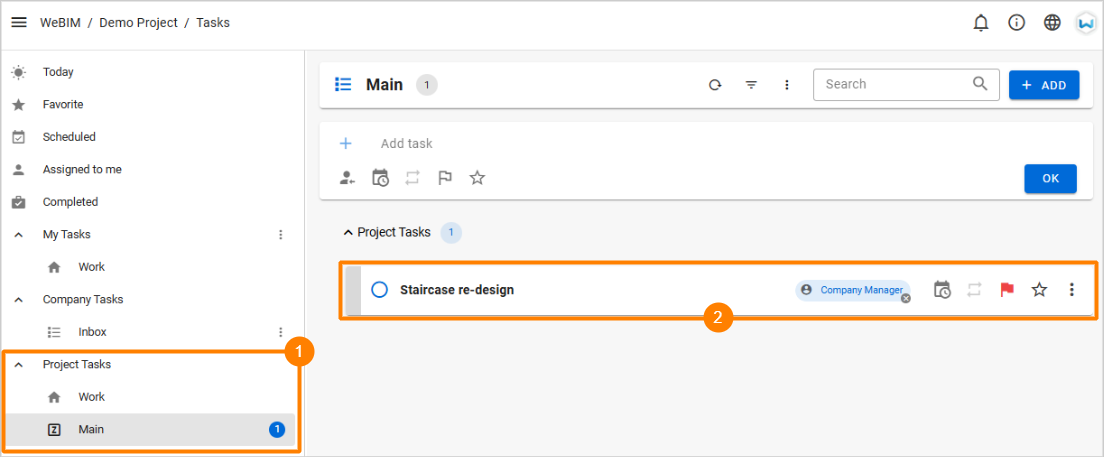
- Return to the Tasks main page, 1 expand the task category, and the 2 newly created task will be displayed.

- Click on the task to open its detailed information viewer. Users can edit details, assign responsible user, and make other modifications as needed.
# Markup Tasks
For creating markup tasks in WeBIMSync, please refer to the Markups guide first.
# Steps
After completing the markup task creation, return to SyncoBox and select a project.
In the project menu, click on [ BIM ]
[ Tasks ].1 Expand the project task categories, select the zone where the markups is located, and 2 the newly created task will be visible.
- Click on the task to open its detailed information view. Users can edit details, assign responsible user, and make other modifications as needed.