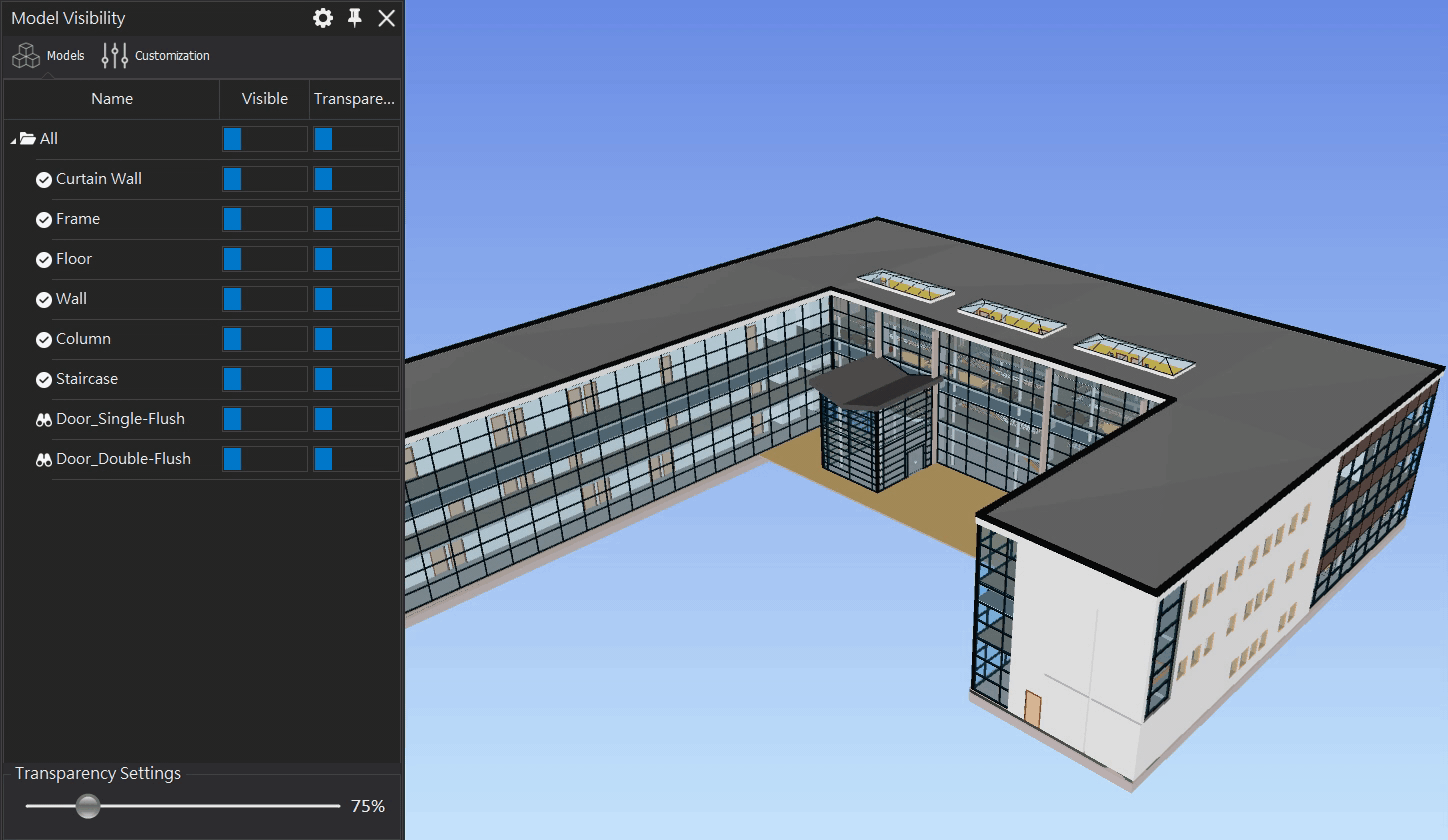
# Model Visibility
# Steps
Click on the [
 Model Visibility ] tab in the Features Bar.
The preset model visibility lists "Selection Sets" and "Search Sets." Users can toggle visibility between Visible and Transparent.
TIP
Before using this feature, ensure you have created the selection or search sets. Refer to Create Selection and Search Set.
# Interface

1 [  Selection Set ] and [
  Search Set ]: Collections of model objects.
2 [ Visible ]: Toggles the visibility of selected sets.
3 [ Transparent ]: Toggles transparency mode for selected sets.
4 [ Transparency Settings ]: Adjust the scrollbar to define transparency percentage; settings will apply upon the next activation.
5 [ ![]() Model ]: Displays preset selection and search sets imported from Navisworks.
Model ]: Displays preset selection and search sets imported from Navisworks.
6 [ ![]() Customization ]: Displays user-defined selection and search sets created within WeBIMSync.
Customization ]: Displays user-defined selection and search sets created within WeBIMSync.
# Create Selection and Search Set
# Project Manager
To create and manage selection and search sets within Navisworks, please visit Autodesk Knowledge Network (opens new window).
# Self-defining Selection Sets
# Project Manager
Click the [ ] button to open the Selection Set Settings window.
On the left side of the window is 1 Zone Selection Sets, 2 enter a name and click [ Create ] button to define a new zone selection set.
On the right side (Model Selection Sets), users can select multiple existing model selection sets, then click [Add Selected to Zone].

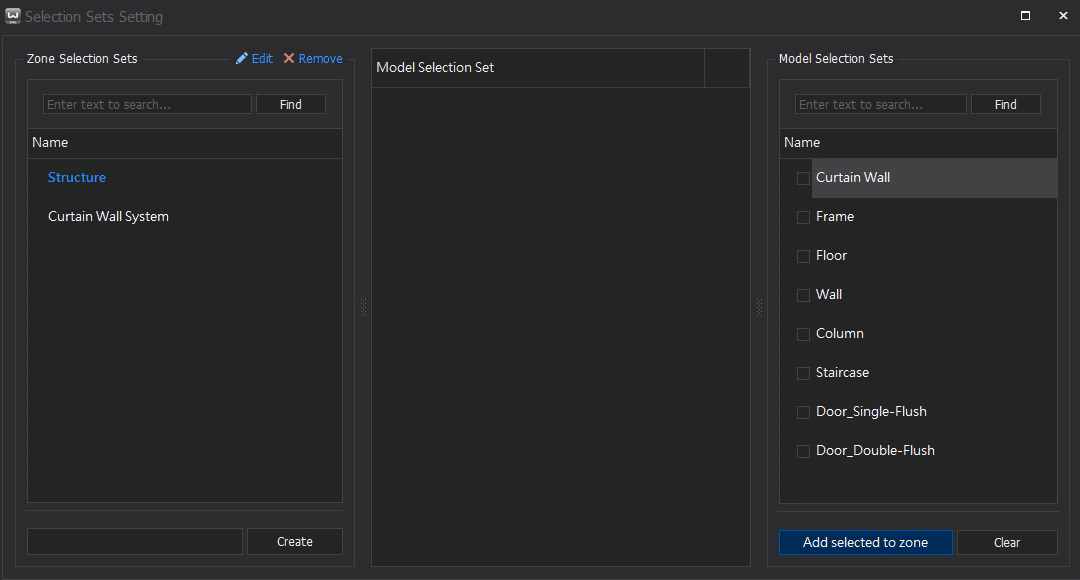
After configuring the settings, close the Selection Sets Settings window.
Return to the Model Visibility list and select [
 Customization ]. Users can now toggle visibility and transparency for their self-defined selection sets.

← Drawings Model Items →