# Project Settings
# Managing Project Members
Project members can be added either by a Company Managers through the Company Settings Page, or directly by a Project Managers within the Project Settings Page.
# Adding Members via the Company Settings Page
# Company Manager
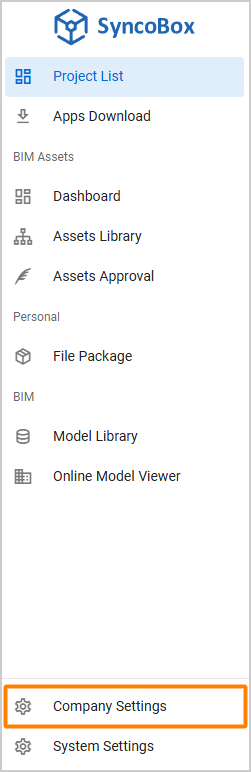
- In the SyncoBox, click the [ Company Settings ] tab of the left menu.
- In the company settings page, select [ Project List ] and click [ Manage Project Members ].
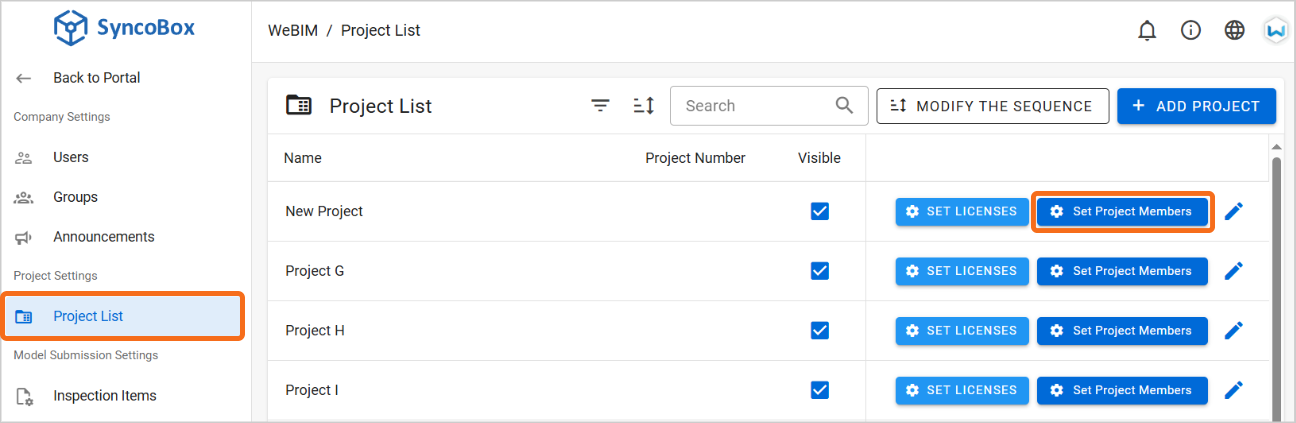
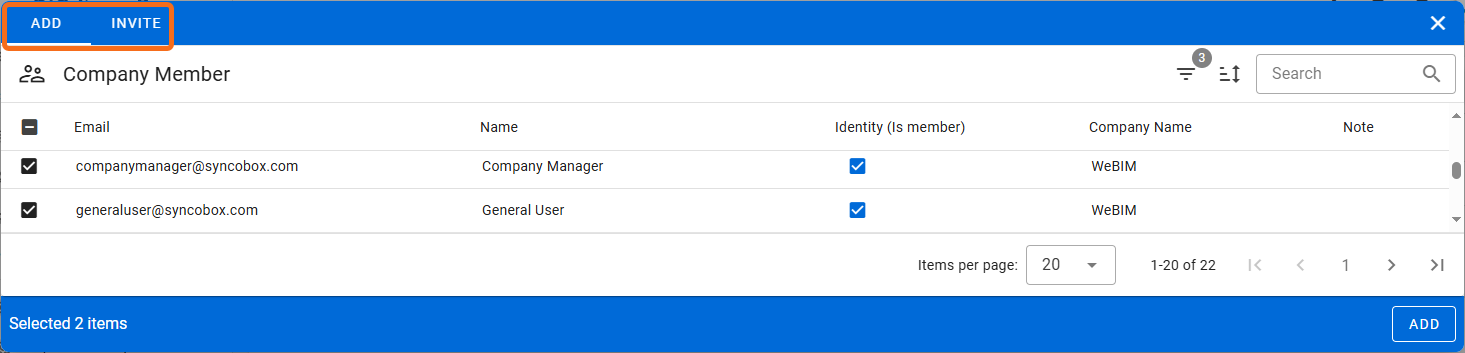
- Within the Project Member list, click the [ ADD ] button.
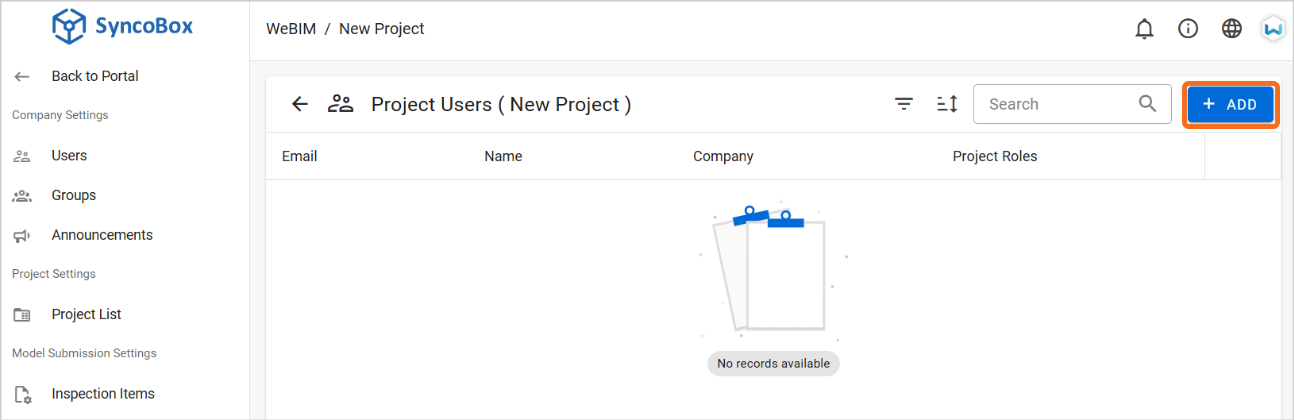
Select company members to add them to the project.
Alternatively, click the [ INVITE ] tab to invite non-company user by their email addresses.
After selecting members or entering email addresses, click [ ADD ] in the bottom-right corner to complete the process.
- In the project member list, click [ Edit Project Role ] to adjust the roles of members in the project.

# Adding Members via the Project Settings Page
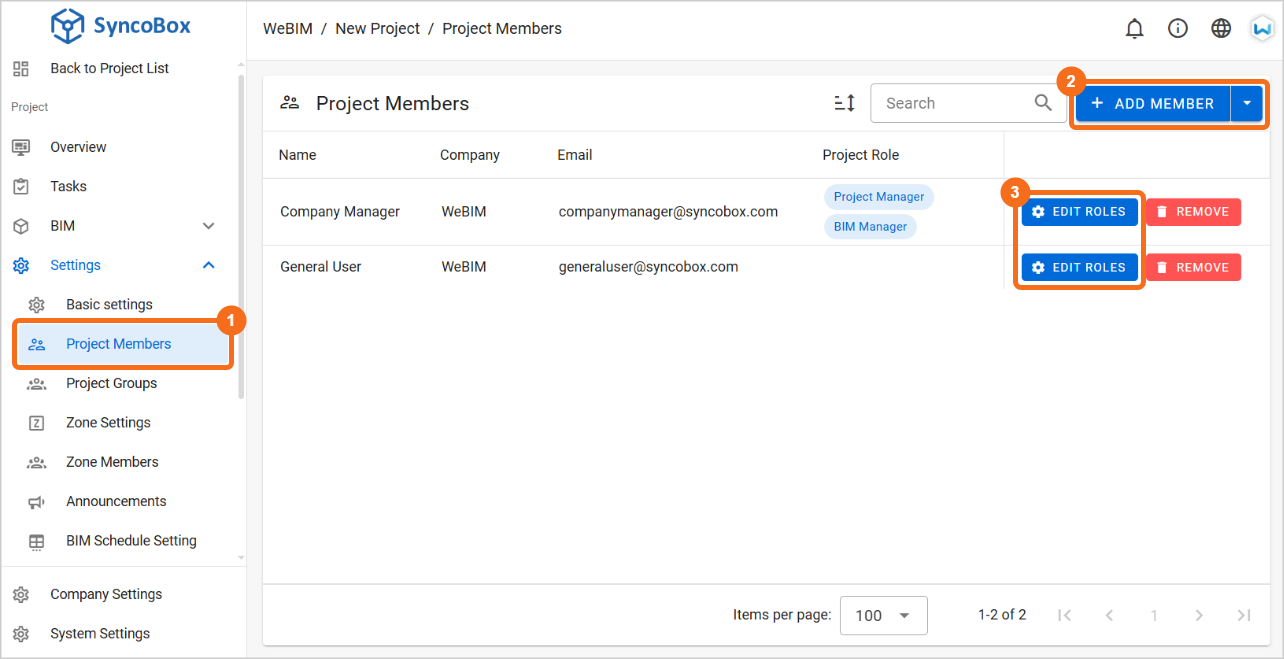
Within the project interface, click [ Settings ]
 [ Project Members ] in the menu.
Click [ ADD MEMBERS ] button to select and add company members to the project.
Adjust the roles of project members by clicking [ Edit Project Role ]. Detailed role descriptions can be found in the Project-Level Roles section.
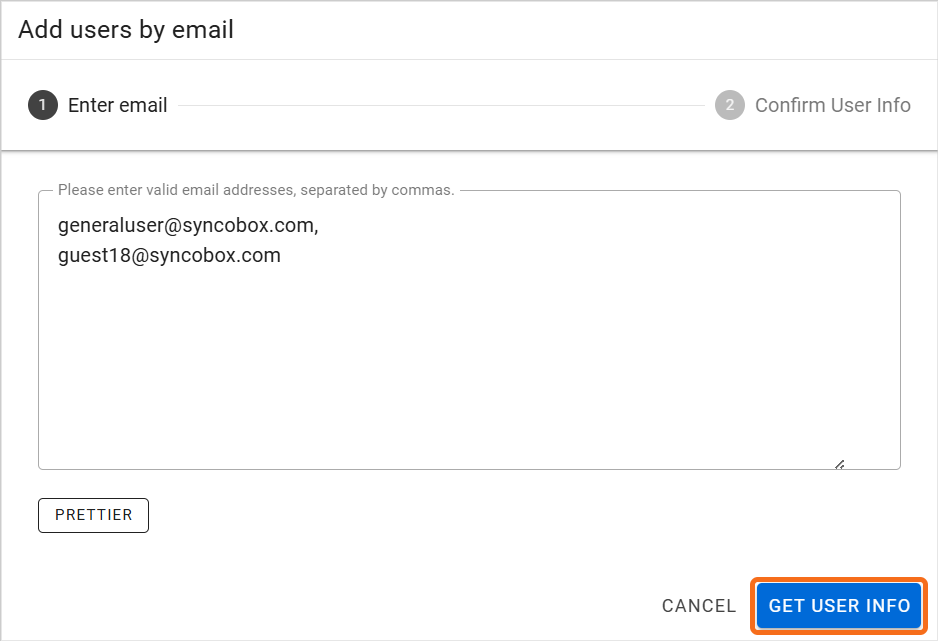
Additionally, you can search and add members by entering their email addresses:
Click the [ ] dropdown menu (which next to [ Add Member ] button), then select [ Add Member by Email ].
Enter the user's email address and click the [ PRETTIER ] button. It will automatically format the email address, ensuring correct entry and arrangement.
Click [ GET USER INFO ] to verify whether the member is already registered on SyncoBox.
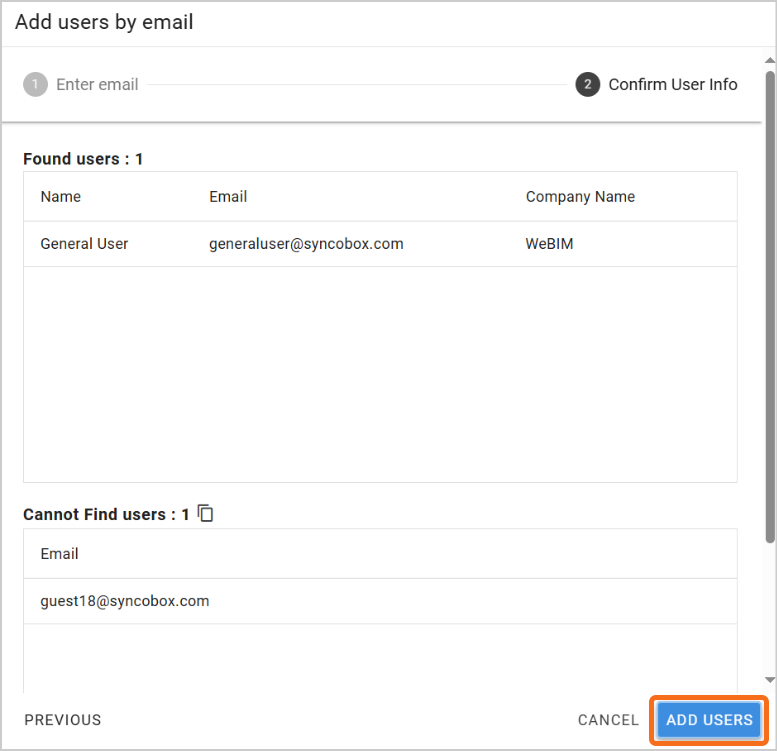
- After the system verifies the user information, a list will be displayed:
If "Cannot Find User" is shown, it means the user has not registered on SyncoBox yet. The user should complete the registration process, or be added by the system administrator.
If "Found User" is shown, it means the queried user exists. Click the [ Add ] button to add them as a project member.
# Creating Zones (Optional)
# Project Manager
Project manager can create and manage zones within a project by following these steps:
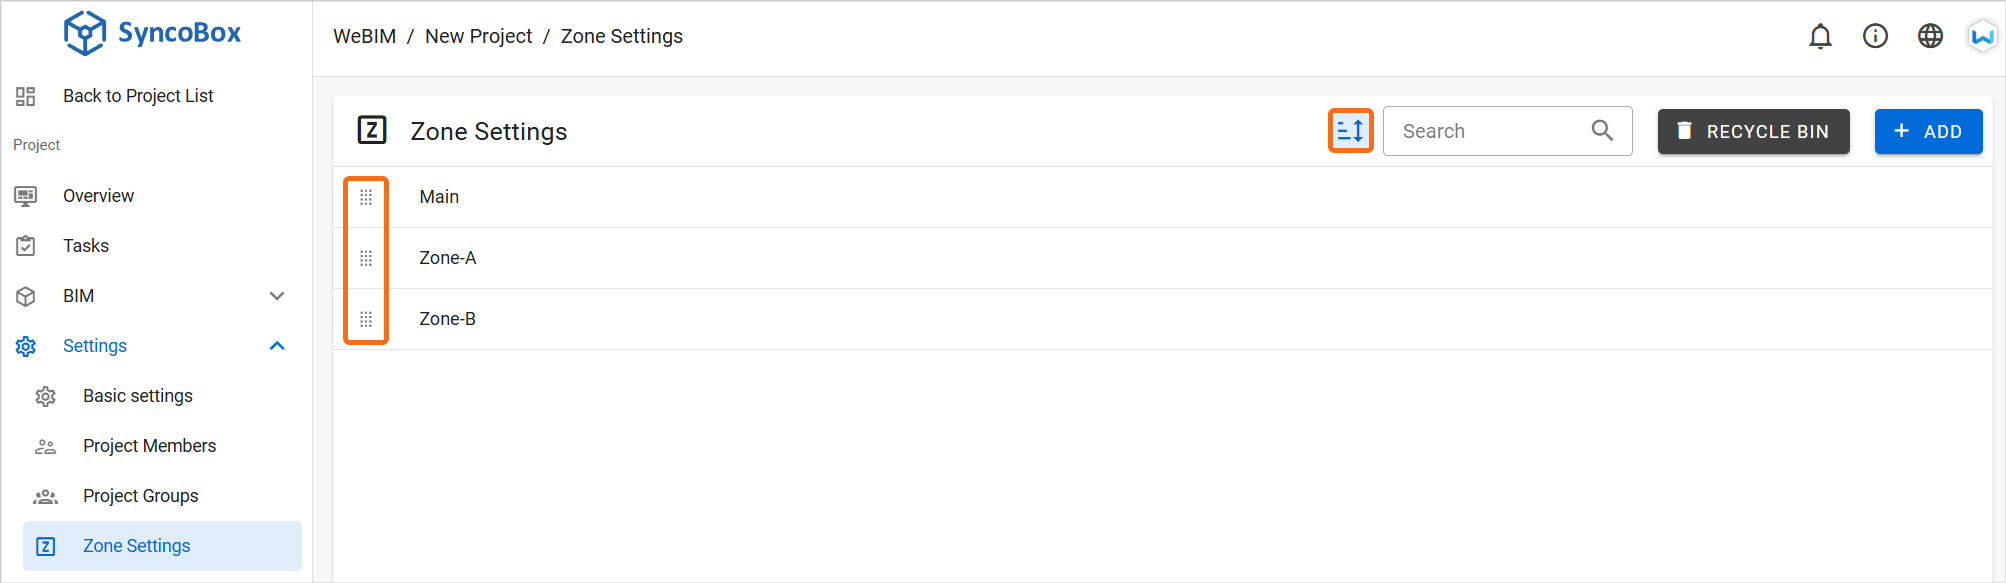
- Accessing the Zone Settings
In a project, click [ Settings ] [ Zone Settings ]. This page displays the existing zone list for the project, including the system's default zone "Main"".
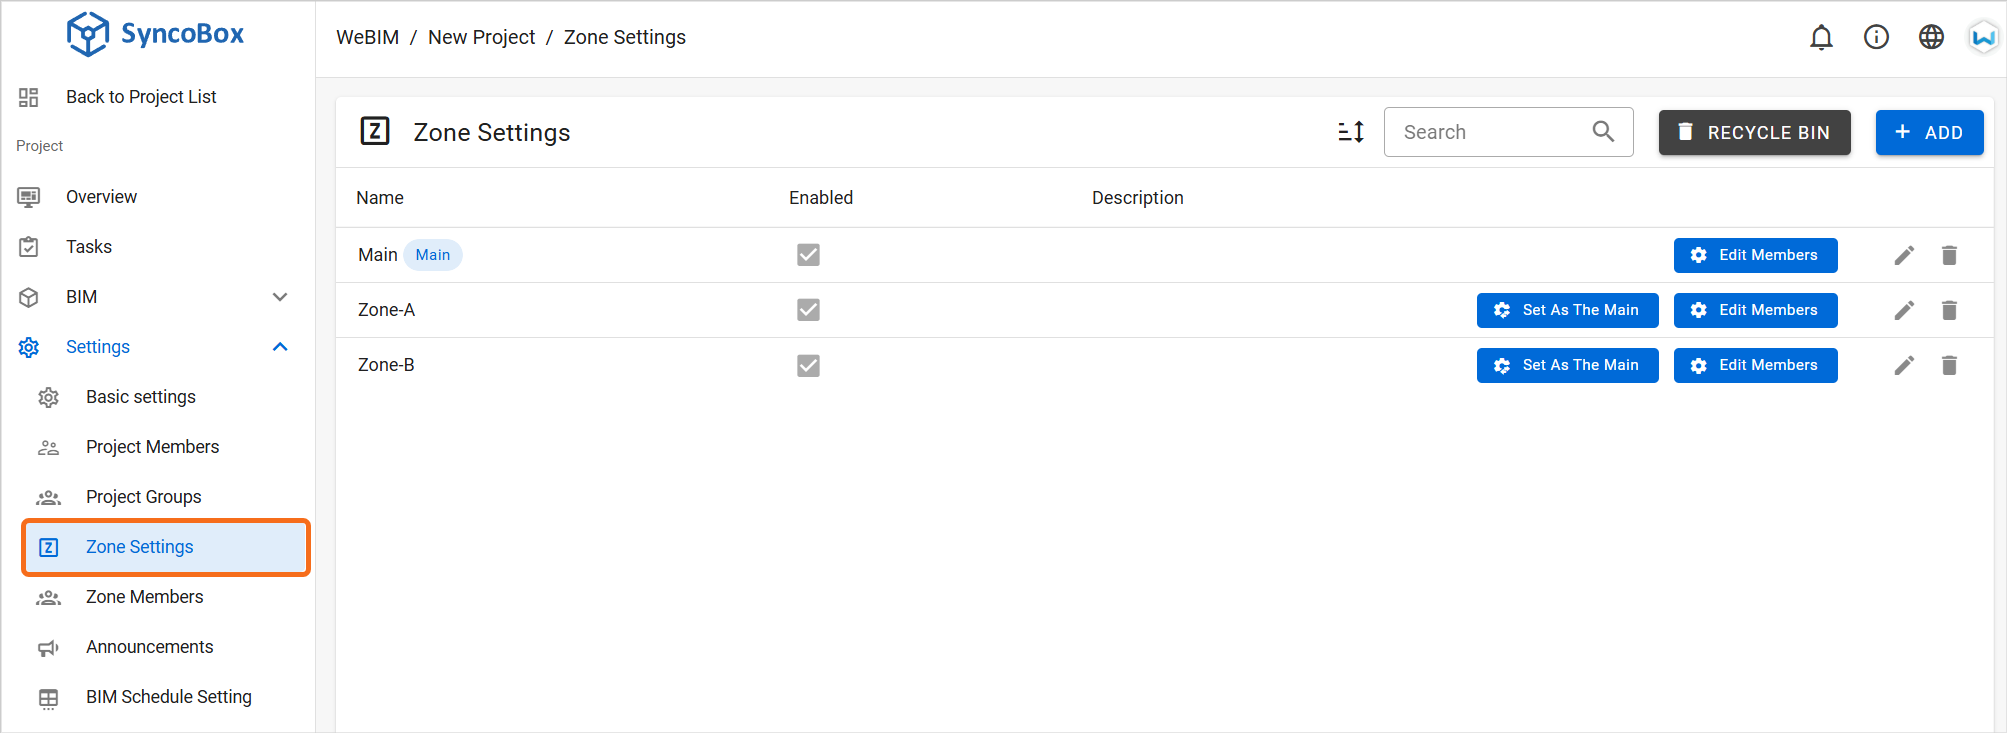
- Creating a New Zone
To create a new zone, click the [ ADD ] button in the Zone Settings page. In the popup window, enter the name of the new zone, and click [ Add ] to finalize its creation.
- Additionally, you can adjust the order of zones by clicking [ Sort ] at the top of the zone list. Drag and drop the [ ] icon to rearrange the sequence as needed.