# Navisworks Clash Detection Plugin
WARNING
You must have the role of Clash Detector in the project or zone to perform the following actions.
# Installing the Clash Plugin
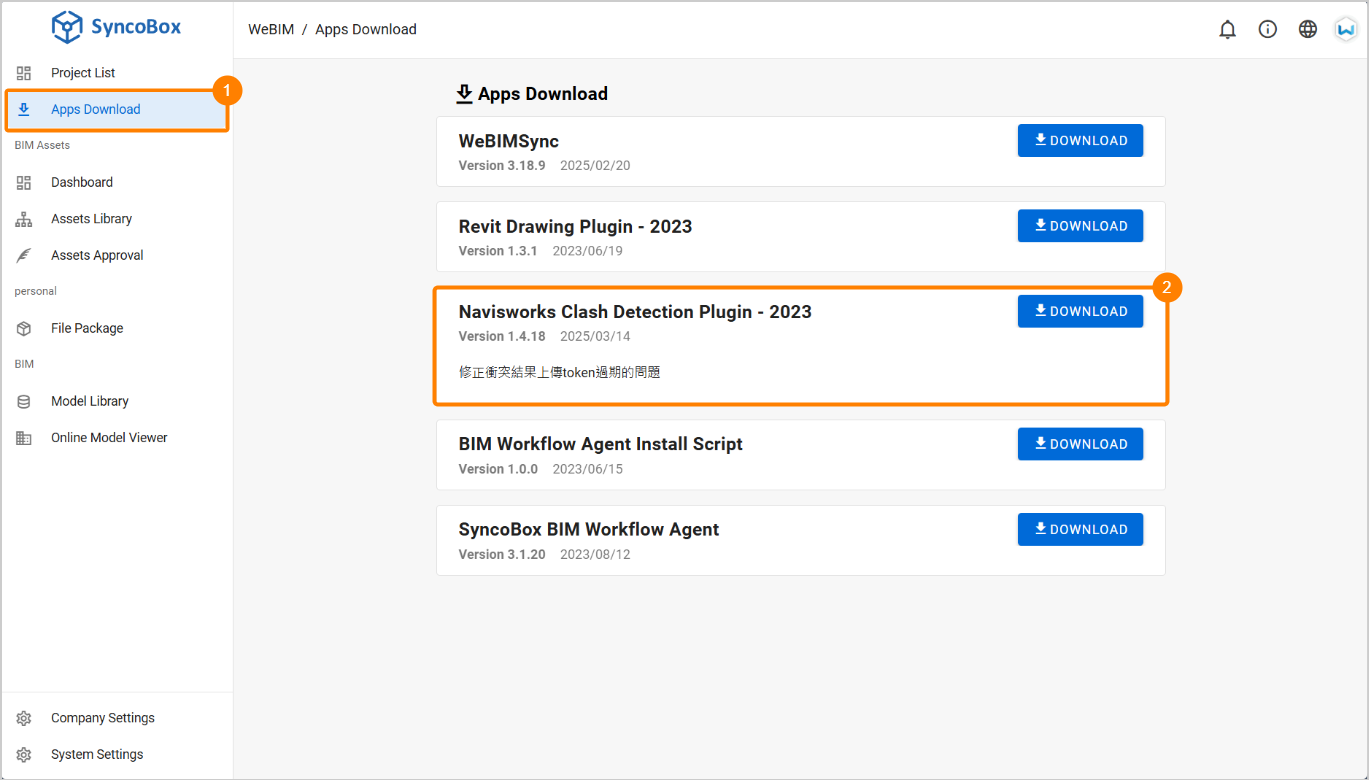
Log in to SyncoBox and click on 1 [ Apps Download ] in the sidebar.
Select 2 "Navisworks Clash Detection Plugin" to download.
After downloading and installation, open the Navisworks.
Click the [ WeBIMSync ] tab, select [ Clash Detective ] to open the plugin.

# Server Settings
- Click [ change ], enter the server path, and click [ check ].

- After confirming the server name, click the [ Ok ] button to proceed to the plugin.

# Opening a Project
Log in to SyncoBox.
Select the project
 choose the zone after the model loads, the main clash plugin window in Navisworks will open as shown below.
TIP
If the popup window appears when selecting a project, it indicates the model set content has been updated. Click [ Ignore All ] to continue.
# Clash Condition Settings
Please refer Autodesk Navisworks Clash Detective User Guide (opens new window).
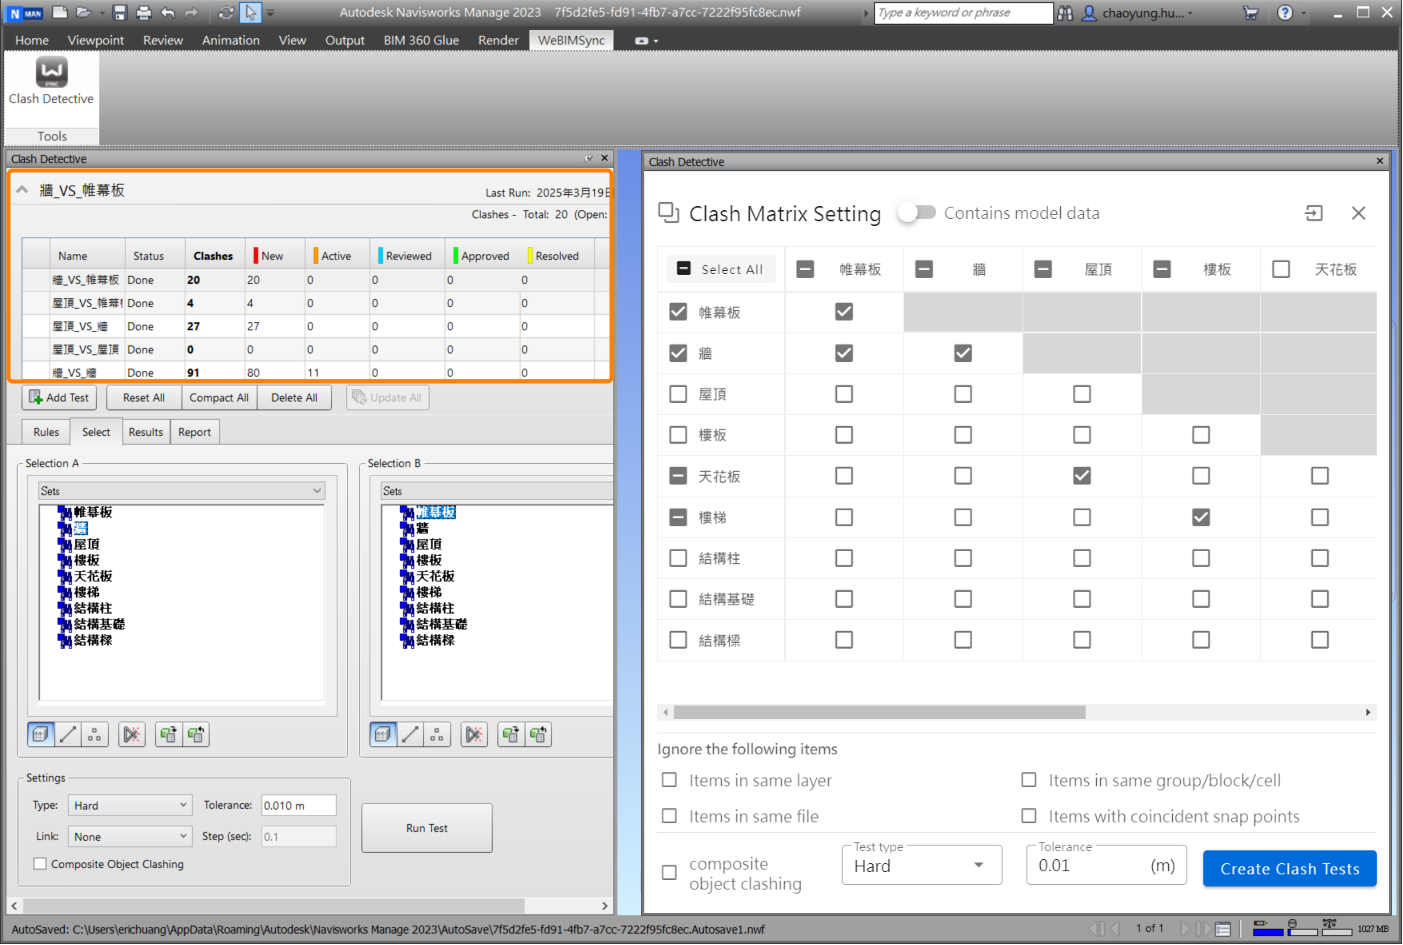
# Executing Clash Detection
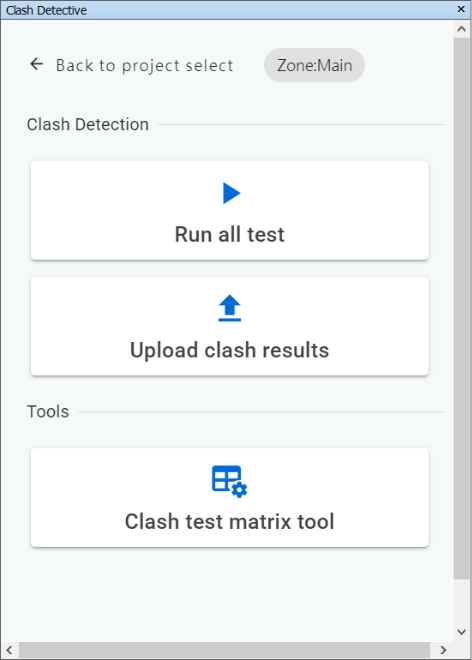
Click the [ Run All Tests ] button to perform all clash tests.

# Uploading Clash Data
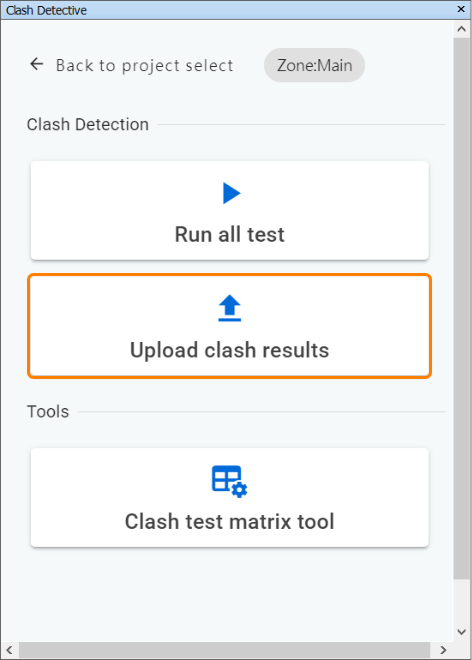
Click [ Upload Clash Results ] to send the clash test results back to SyncoBox.
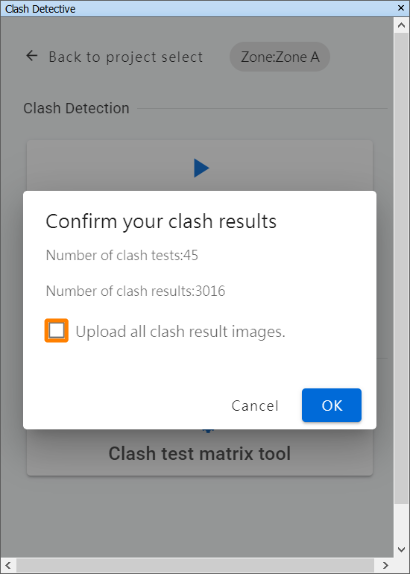
- You can check [ Upload All Clash Images ] to upload screenshots of all clash data, or leave it unchecked to reduce upload time.
TIP
Checking [ Upload all clash result images ] may significantly increase upload time. Please do not close the window during this process.
If unchecked, clash images can be later uploaded directly through the WeBIMSync.
# Clash Test Matrix Tool
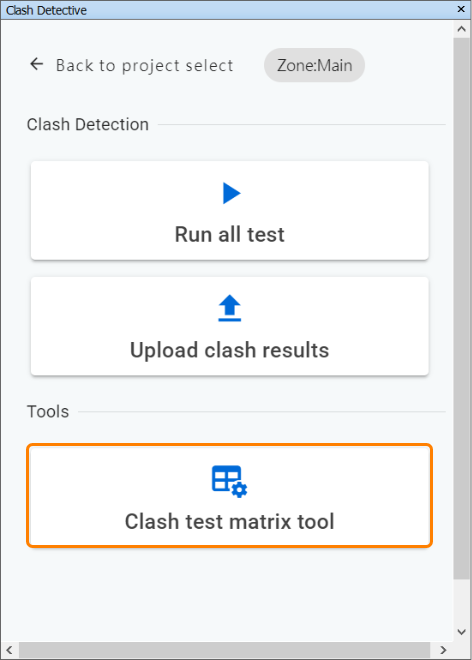
For setting specific clash conditions or constructing clash detection logic through matrix methods, use the [ Clash Test Matrix Tool ] for rapid setup.
- Click Clash Test Matrix Tool to open the settings page, which includes:
1 Inclusion of models in the matrix
2 Import/Export settings
3 Matrix content selection
4 Clash condition settings
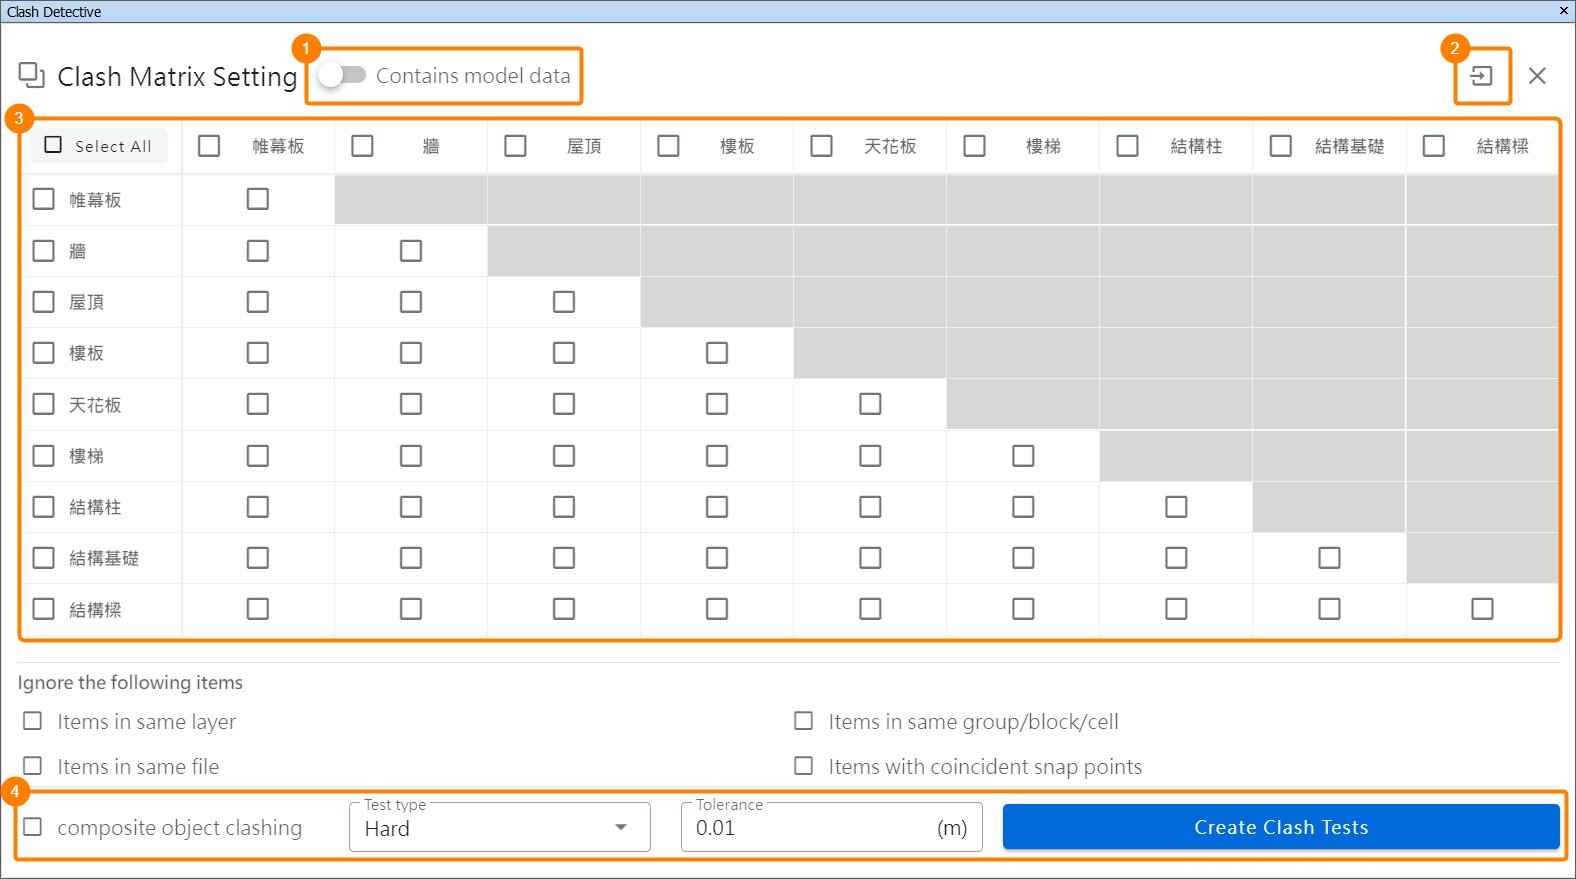
- After configuration, click the [ Create Clash Tests ] button.
TIP
Please refer Navisworks User Guide (opens new window) for instructions on creating model selection and search sets.
- Finalize clash condition setup.
- Click [ Import ] / [ Export ] button to save clash matrix settings as a configuration file or import existing configuration files.
WARNING
When importing configuration files, items without corresponding model or selection set names will be automatically ignored.
Export Settings: Saves current selections as a configuration file (.json) for reuse.
Import Settings: Quickly applies existing configuration files (.json) to set up the matrix.
TIP
If the configuration file lacks matching models or selection sets, an error message appears, highlighting missing items with a red background.