# Starting WeBIMSync
# Quickstart
1 Click on the [ Login ] button.
2 Enter your login credentials in the provided fields, then click [ Login ].
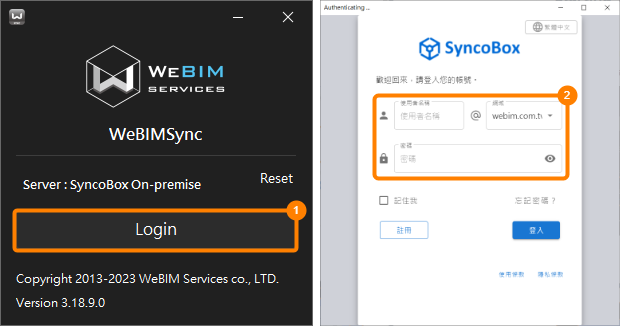
- Click the project thumbnail to access the project.
# User Interface
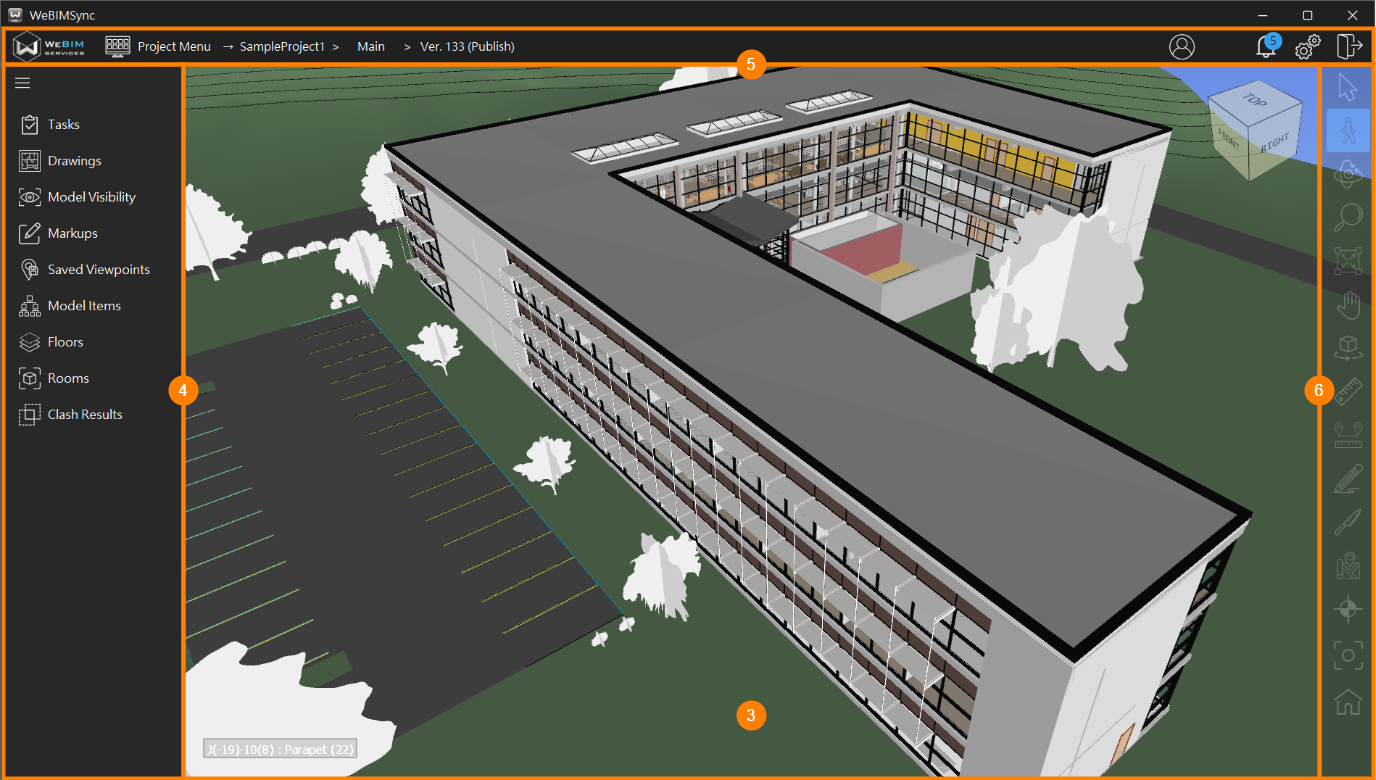
# 3 Model View
The main area is the Model View, allowing users to browse and interact with the model. The ViewCube is located at the top-right corner. Users can quickly adjust viewpoints by clicking on the faces or corners of the ViewCube.
# 4 Features Bar
The Features Bar provides functionalities such as tasks, quick positioning, model visibility, markups management, viewpoints switching, floor and room switching, clash management, and more.
# 5 Options
From left to right, the Options Bar displays icons and labels for:
- Return to Project
- Project Name
- Zone
- Version
- Settings
- Logout
# 6 Toolbar
The Toolbar includes features for model operation, measurements, section views, markup creation, and drawing browsing.
TIP
For more instructions, refer to the "Basic Features".
# Settings
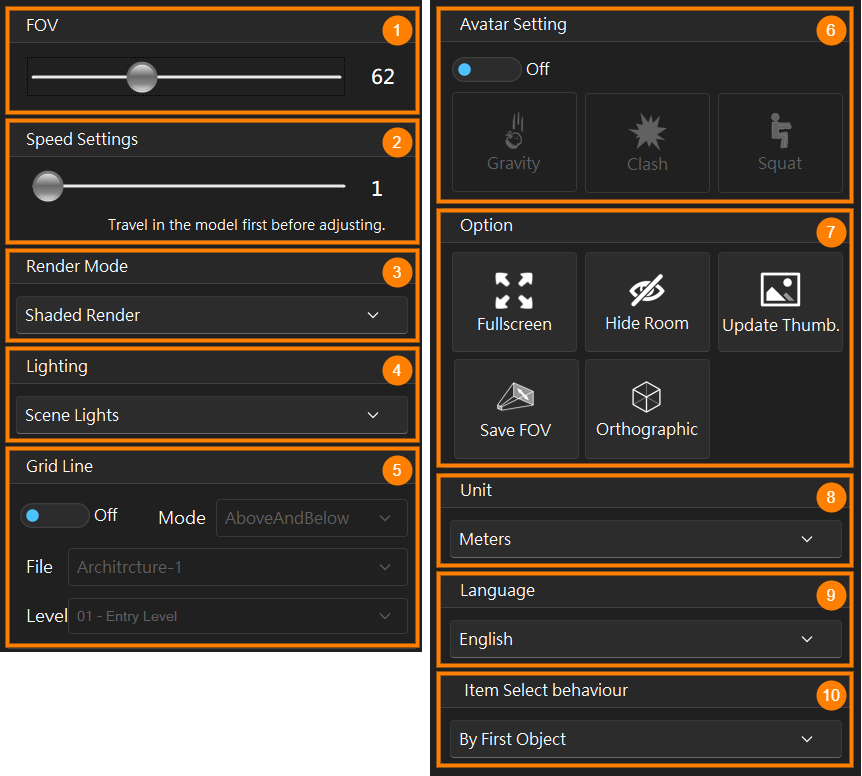
1 FOV(Field of View): Adjust the camera's field of view.
2 Speed Settings: Adjust navigation speed within the model.
3 Render Mode: Choose from "Full Render," "Shaded Render," "Wireframe Render," or "Hidden Line Render." For more details, visit Autodesk Knowledge Network (opens new window).
4 Lighting: Select between "None," "SceneLights," "Headlights," or "FullLights" lighting modes. More information available at Autodesk Knowledge Network (opens new window).
5 Grid Line: Adjust the elevation for displayed grid lines. Further details are available at Autodesk Knowledge Network (opens new window).
6 Avatar Setting: Control a virtual character within the model to inspect spatial designs. Options include "Gravity", "Conflict", "Crouching"
7 Option: Toggle settings such as "Full Screen", "Hide Room", "Cover Snap", "FOV Fixed", "Orthographic", and "Grid Line."
8 Unit: Set measurement units.
9 Language: Supports Traditional Chinese, English, and Japanese.
10 Item Select behaviour: Define selection methods for model components. For detailed guidance, visit Autodesk Knowledge Network (opens new window).